We’re all familiar with the adage “A picture says a thousand words”. Your inspection findings influence your client’s confidence in one of the most significant purchases they may ever make. Simply including photos of major or hard to describe findings certainly adds much to your report presentation, but you may take it a step further. Highlight observations using arrows, circles, and similar tools, and clarify your findings by enlarging image areas or including labels. Do all this easily and quickly using tools built right into your powerful 3D Inspection System software.
How to edit inserted images
You may annotate images when initially inserting them into inspection reports or afterward, whichever is most convenient. Click any image thumbnail in the body of the report writer to instantly display it for larger viewing or editing.
Using view and edit image tools
![]()
It’s easy to use tools to draw arrows, circles, or boxes on your photo:
2. Click the type of desired object (arrow, circle, rectangle, magnify) in the toolbar.
3. Click and drag your mouse on your image, corner to corner, where you wish to place the object, to the size desired.
4. Before saving and exiting to the report, you may click an object you’ve placed to resize its edges or adjust its Color or Transparency further. Click and drag the center of an object to move it. Use the Delete tool to remove a selected object. Once imported to the report, objects become a permanent part of the image, but you may always remove and reinsert an original image fresh if ever desired.
- Drag a light colored (white or yellow) solid circle or square over an area of the photo, and make it somewhat transparent (using the “Transparency” tool) to emulate a flashlight shining on the area or to lighten it. Use a darker colored solid but transparent object to highlight a lighter area of an image. Make arrows transparent so they don't obscure any part of the picture.
- Use the “Magnification” tool to enlarge a selected area of your image, while the rest of the image remains normal size. Great for zooming in to show a detail!
- Use other tools to adjust image aspects like overall Brightness on the fly. Or Rotate, Flip, Crop, or apply a frame border to the image.
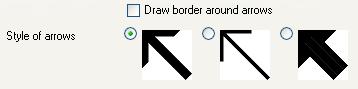 Specify a preferred Arrow style/thickness ahead of time using the main report writer Preferences > Preferences, Image options tab.
 - Other report writer Preferences, Image settings may also be used to turn on automatic frame borders and set frame color, and adjust other items.
Be sure to spend some time playing around and exploring other included tools so you are aware of your full arsenal of options. Then while reporting, save that thousand words and make your point quickly and easy to understand!
Watch this video for examples of the various image editing options within 3D!


 Need Support