Custom Form Studio can be used to create new forms or change existing ones.
Before reading about creating custom forms you may want to read our tips and tricks article Custom Form Studio - Create Your Own Form Group! It includes a brief introduction to Custom Form Studio and information on starting a new form group.
Before making any custom changes it is strongly recommended you create a backup in case you mess up any of your forms!
You can create a full 3D backup of all of your forms, reports, etc. by following the directions here: https://3dinspection.com/tips-and-tricks/safeguarding-your-important-3d-inspection-system-data.html
Before continuing please note that some editions of 3D may not include all Custom Form Studio Features.
In this article we will discuss creating new forms within Custom Form Studio.
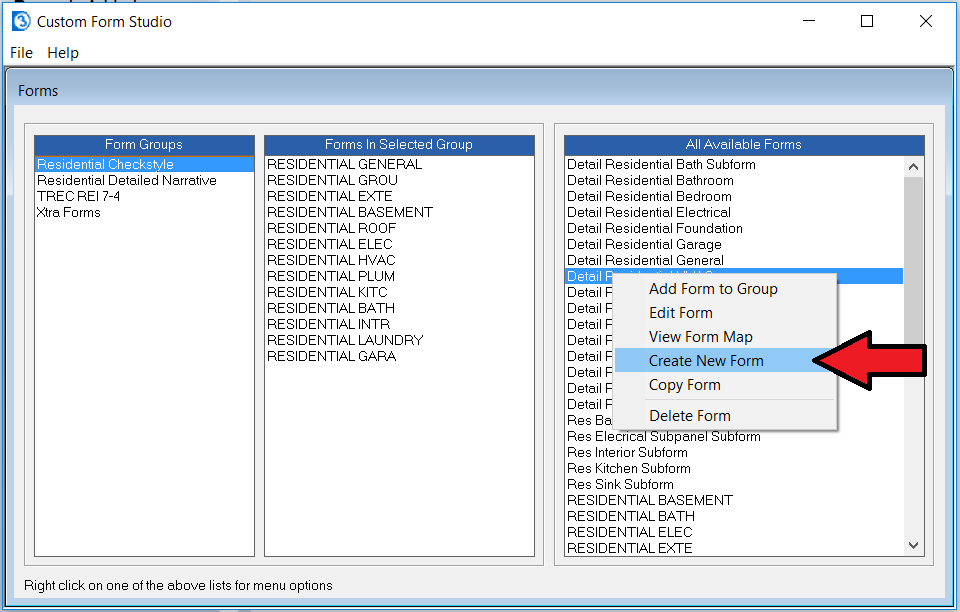
To start, open Custom Form Studio.
Then Right click in the right pane "All Available Forms" and select "Create New Form"
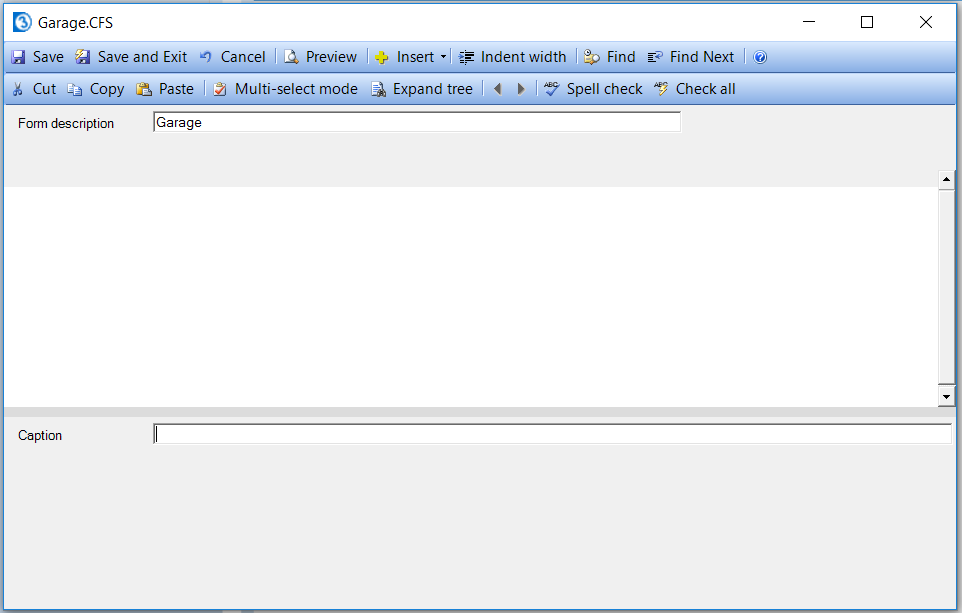
A new window will open asking for a name for your new form. In this example we'll name the new form "Garage". Click OK once you've chosen a name.

A new window will open. This is your new form which is currently blank. You'll be able to see the name of the form in the top left hand corner. The Form description is what prints on the final report, regardless of what the form name is, when the form is used as a main form in a group.
Now that we've started our new form we will add a Heading to get started. A Heading is one of the main areas of a form and acts as a sort of title. You can add multiple Headings to a form to act as dividing areas for the main components of that form. Note that you can start a new form off with a Heading, Text item, subform, or diagram.
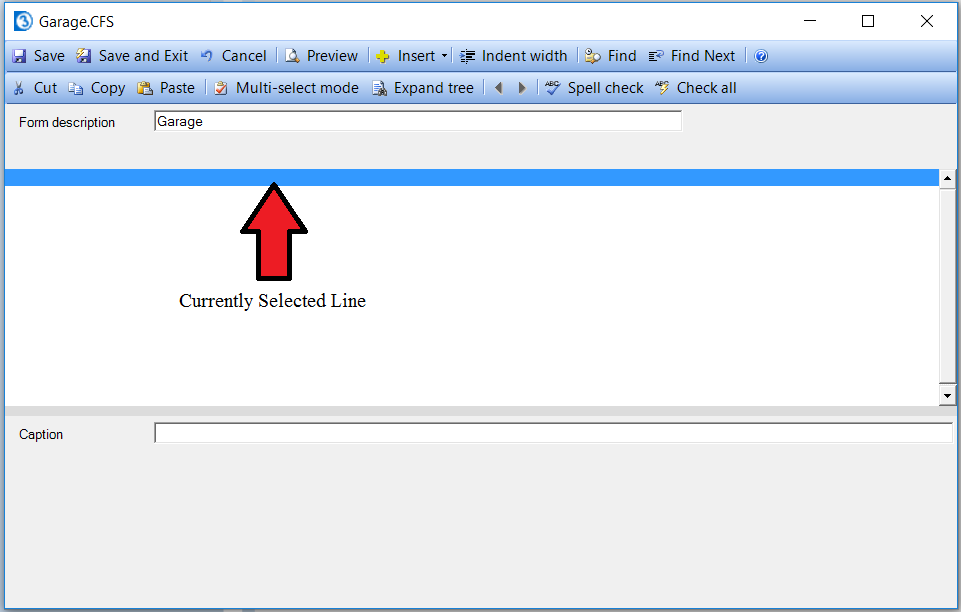
To add a heading click on the first blank line of the form if it is not already selected. It will be highlighted blue once you've selected it.
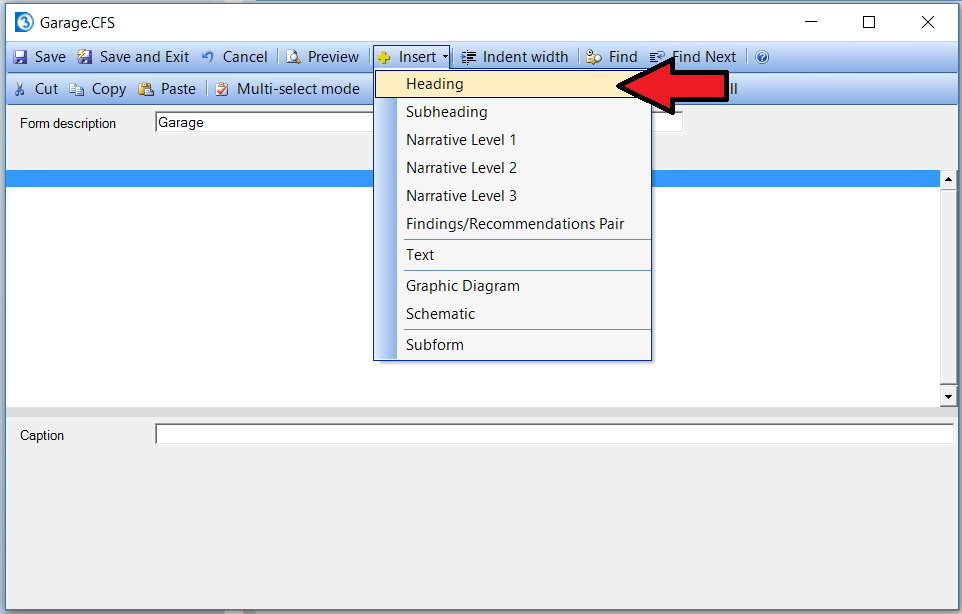
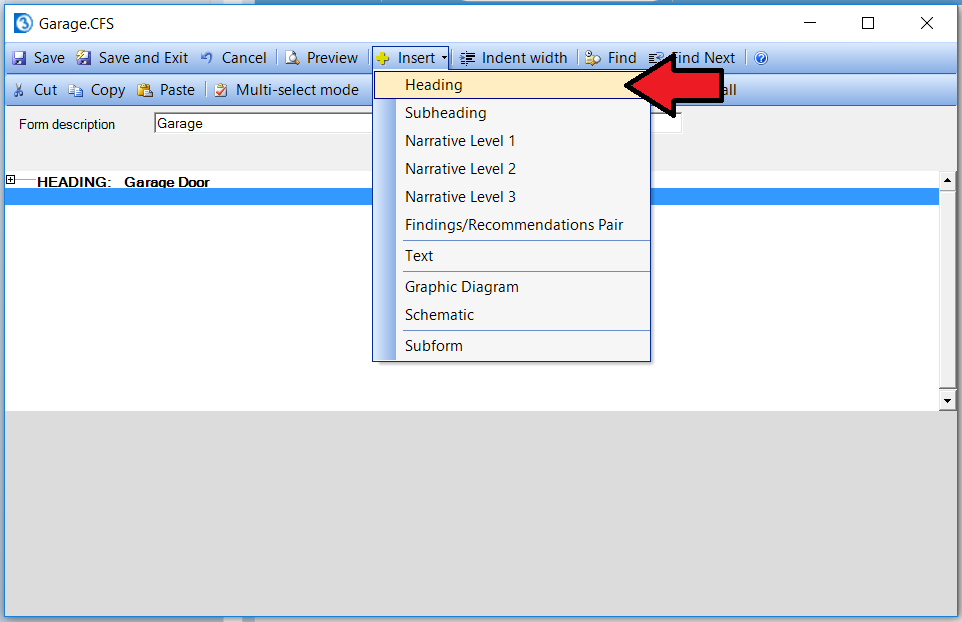
Now click the Insert button on the top toolbar and select Heading.
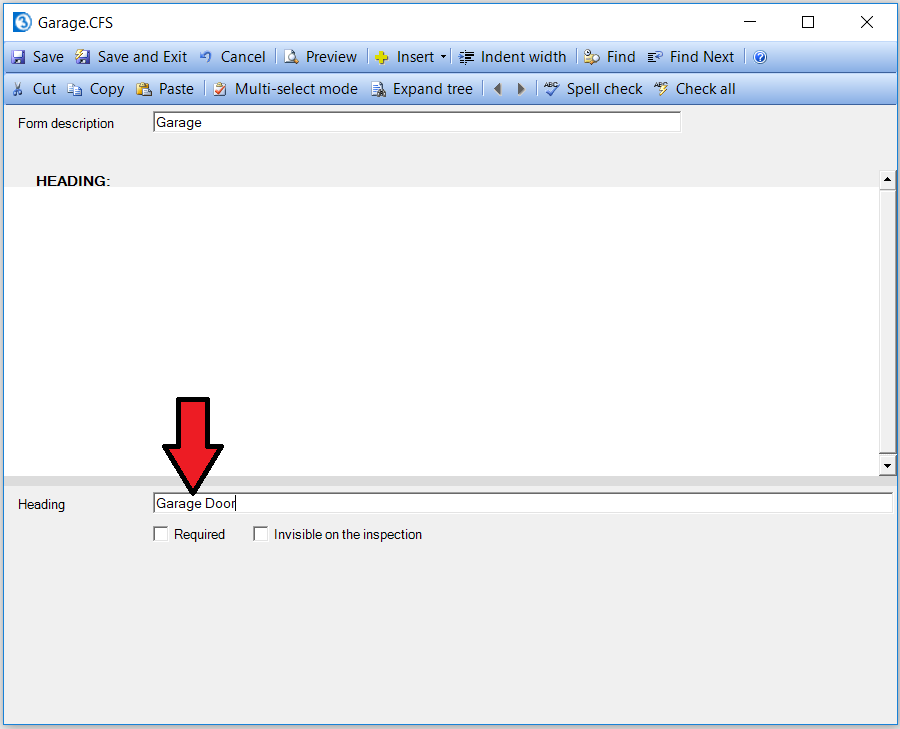
Now that we have our first Heading added we need to name it. In this example we'll name it Garage Door.
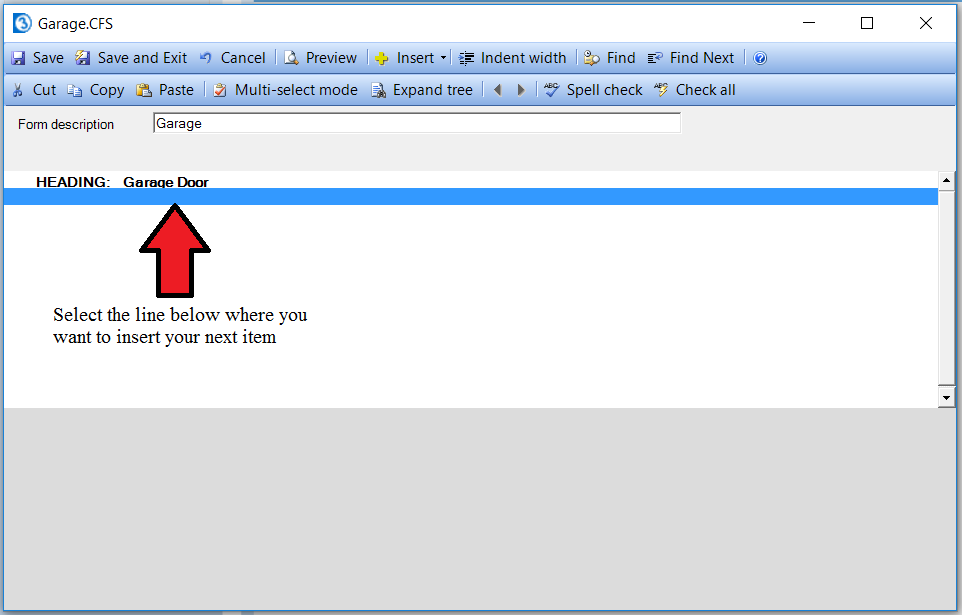
Now we will insert a subheading under the Garage Heading. You can have just one subheading underneath a heading or multiple subheadings underneath a heading. Usually these are items related to the Heading. It's important to note that whenever inserting something into a form it will be entered on the line above the currently selected line. So we will start by clicking the blank line beneath our Heading. This refreshes the Heading area with the name we assigned previously.
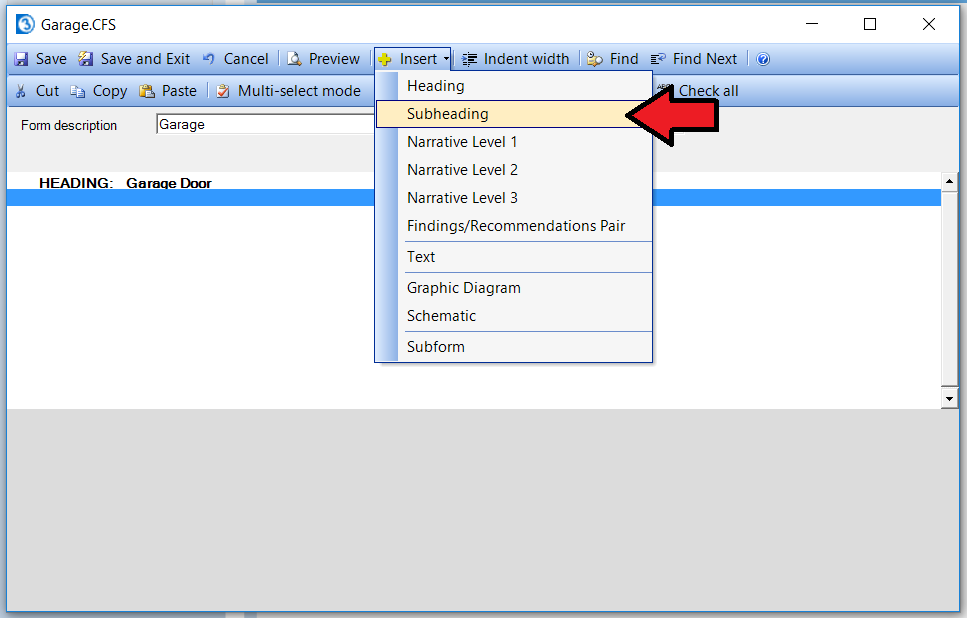
Now we will again click the Insert button on the top toolbar. This time we will select Subheading from the drop down menu.
Now we have a blank subheading beneath our heading.
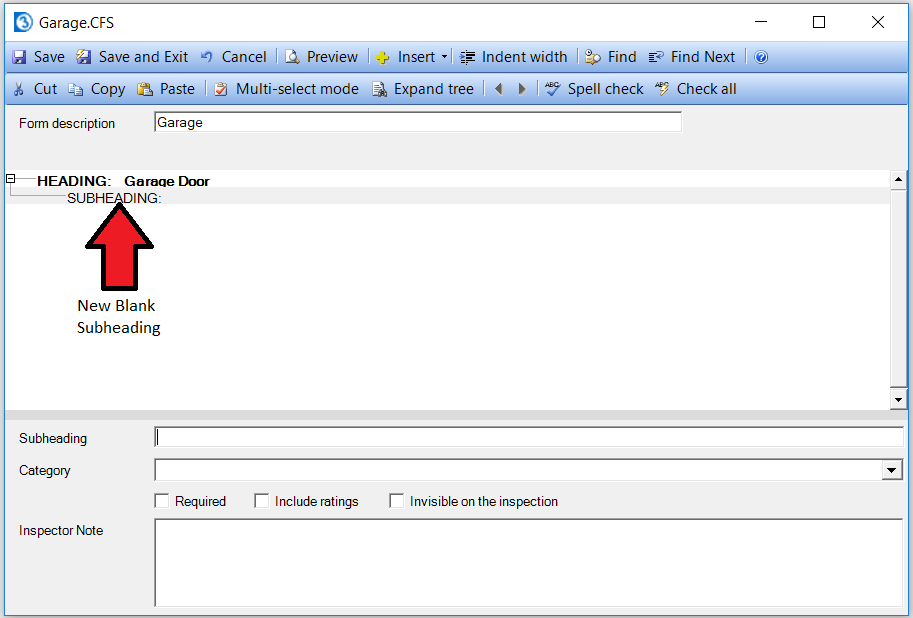
We need to fill out the subheading information at the bottom of the screen. We'll name the subheading "Door Operator".
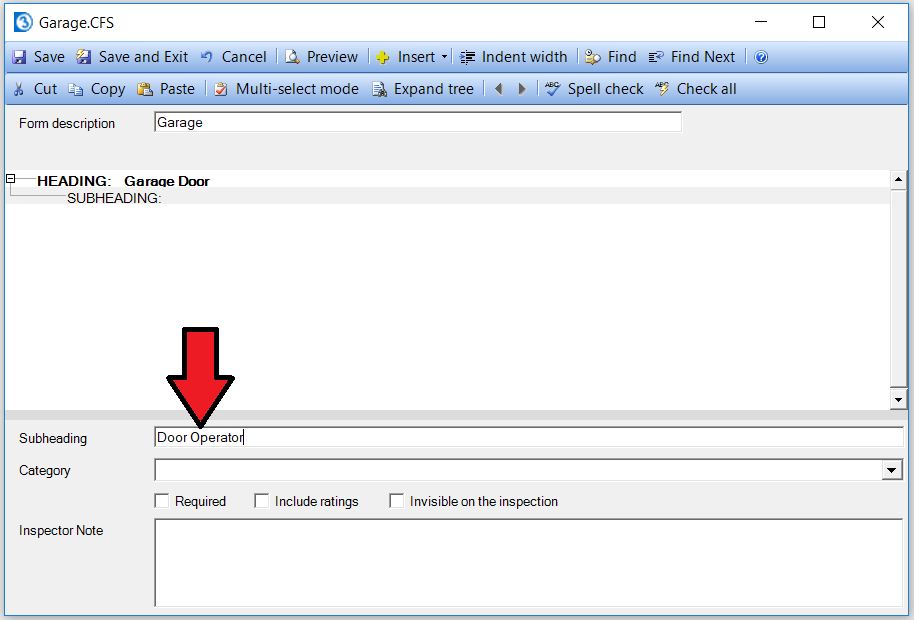
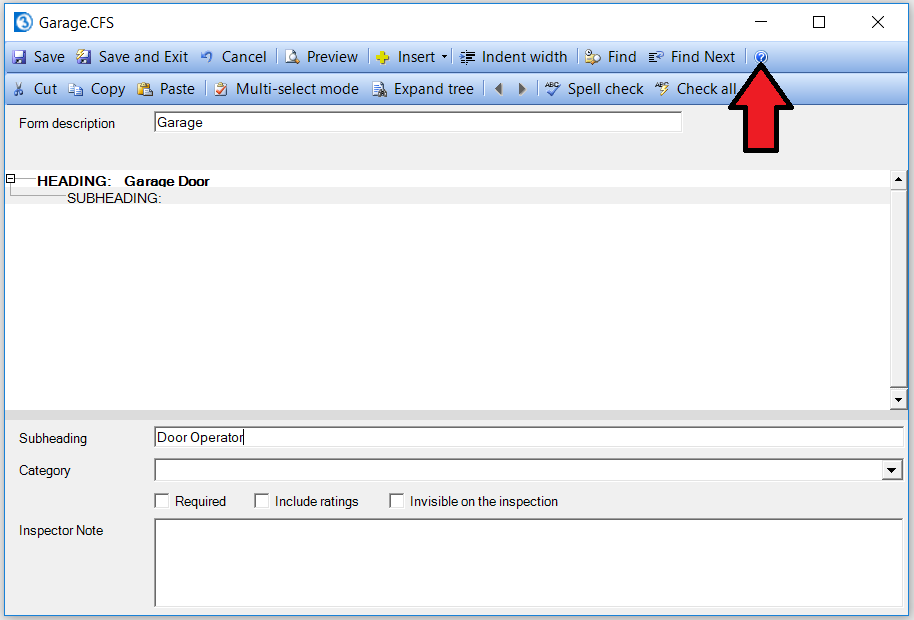
We'll leave the rest of the Subheading options blank. If you wish to know more about those options they can be read about in Custom Form Studio by going to the question mark icon within the form.
Now that we've got our subheading we need to add some narrative comments to it. The narrative text is the pre-written comment or statement that may be selected for a particular subheading label in the final report. When you're doing a report you would add the narrative comment to the subheading label using the narratives pane.
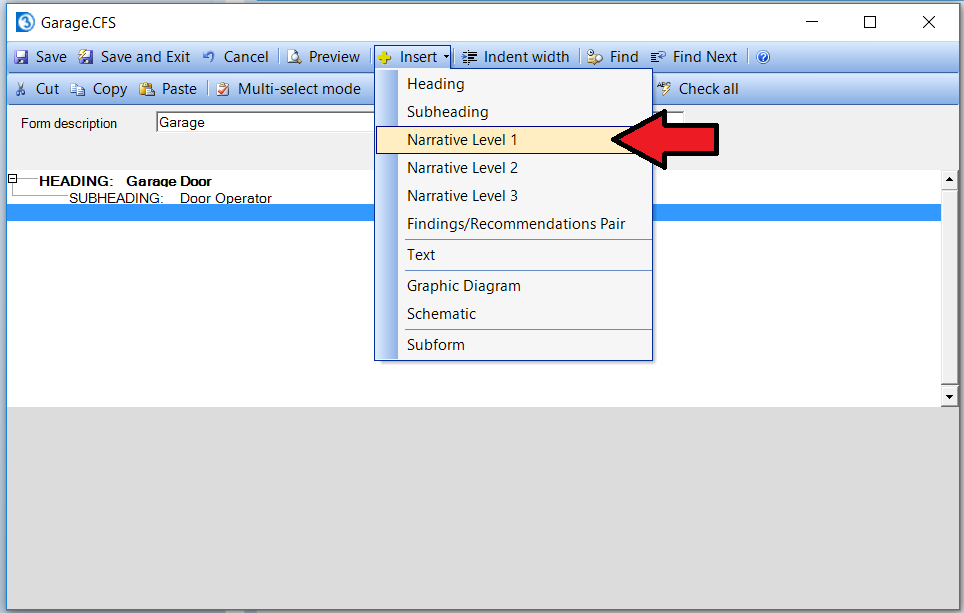
To add a subheading click on the line below our Subheading. Then click Insert on the top toolbar and select Narrative Level 1. Narrative Level 1 items would be main level items that you always see. Other narrative level items are not seen unless it's parent level is selected first.
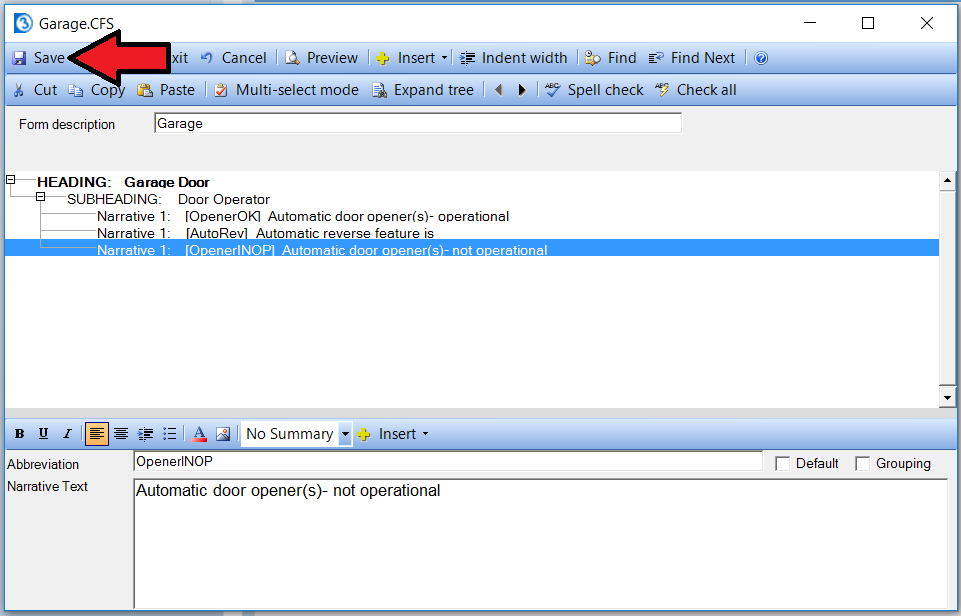
We are going to have a total of three narrative level 1 comments for this Subheading. So repeat the above step to add two more Narrative Level 1 items. Normally it's best to add and complete them one at a time, but we're adding them at once so you can see the structure.

Now we need to fill out the information for the narrative items.
The Abbreviation is what we will see in the narrative pane when filling out a report to let us know which narrative it is. It's a good idea to keep this short.
The Narrative Text is what will actually be added as a comment for a subheading field in a report when selecting the narrative from the narrative pane.
You can choose to mark the Narrative as a "Default" using the check-box. This would make the comment automatically be added or pre-selected for the subheading when the report is initially created. Although it may be deselected, it's best to reserve Default status for comments that nearly always would apply.
You can also pre-set the narrative item for a Summary area if selected or use Insert to include merge codes that import Office Management information from the related job into the narrative, such as the clients name.
We'll go ahead and fill out the three narratives we just added. Once we've added them we're also going to click the Save button. When creating forms you should try to regularly save your work.
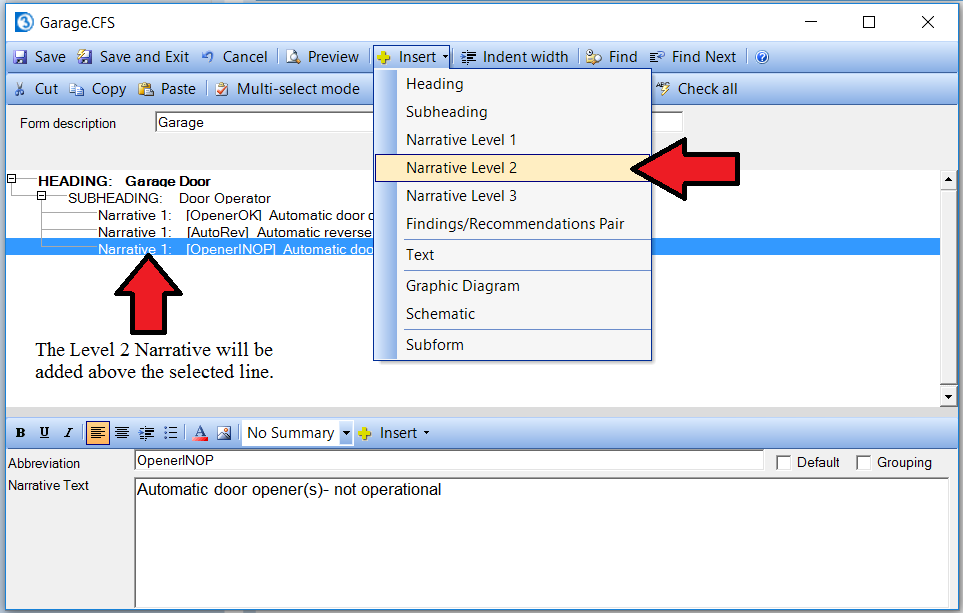
Now that we've finished the three Level 1 Narratives we're going to add some Level 2 Narratives. Note that use of additional narrative levels is not a requirement, but can make selecting related comments efficient or more convenient. As of now our 2nd narrative is not very informative. We need more narratives for adding detail. We could add more Narrative Level 1 Items, but it's a better idea to use Narrative Level 2 items when they are related to the Narrative 1 item. Narrative Level 2 items are child items of a Narrative Level 1 item and are hidden from view in the Narrative Pane in Report Writer until that Narrative Level 1 item is selected. This will make it easier when doing the report so we don't have to navigate through as many narratives to find what we want.
To add a Narrative Level 2 item click on the line below the Narrative Level 1 item you want to add the Narrative Level 2 item to. Then click insert on the top toolbar and select Narrative Level 2.
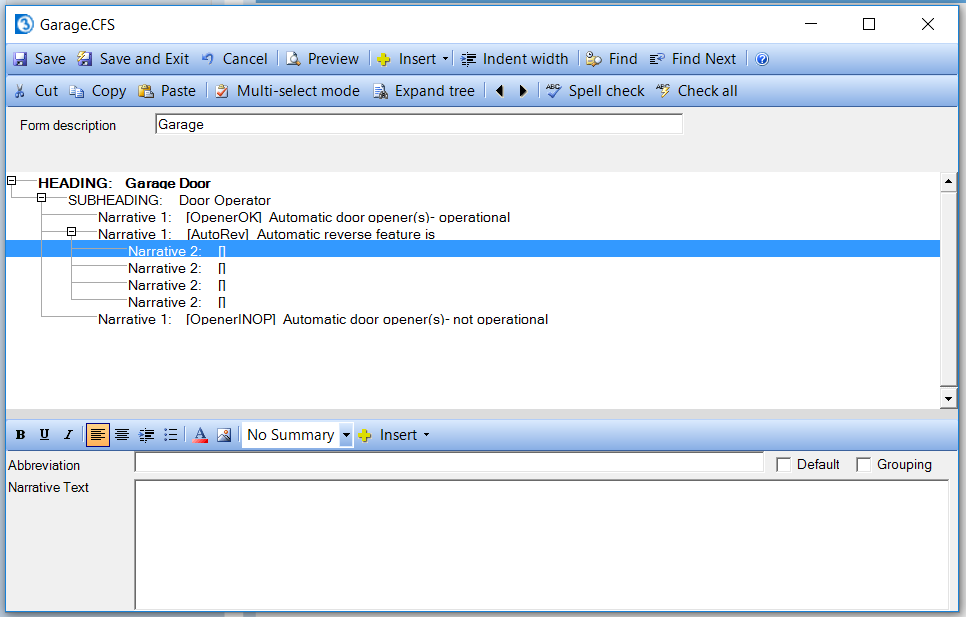
We're going to add a total of four narrative level 2 items onto the Narrative Level 1 "[AutoRev] Automatic reverse feature is".
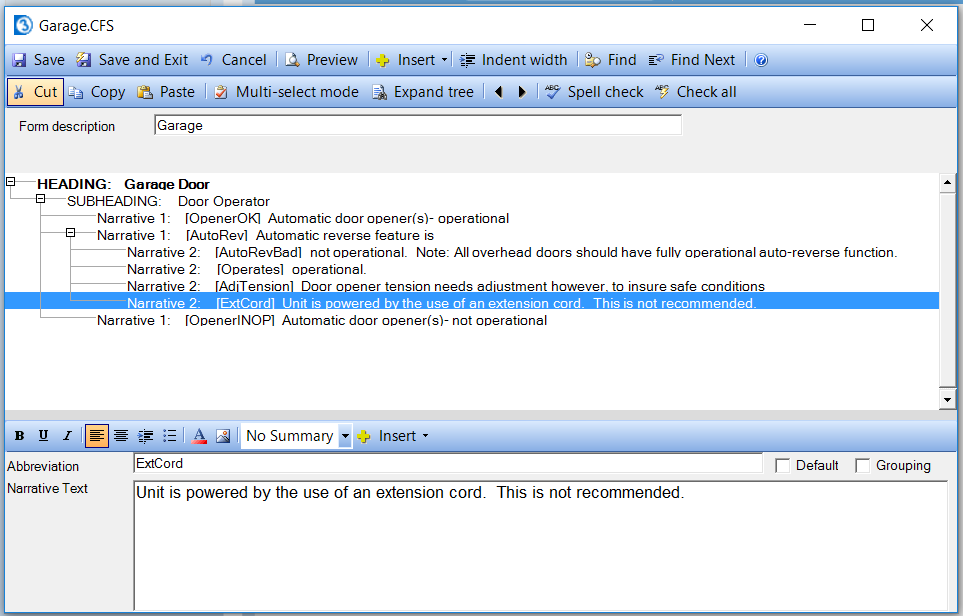
We'll fill out the Narrative Level 2 items just like we did for the Narrative Level 1 item earlier.
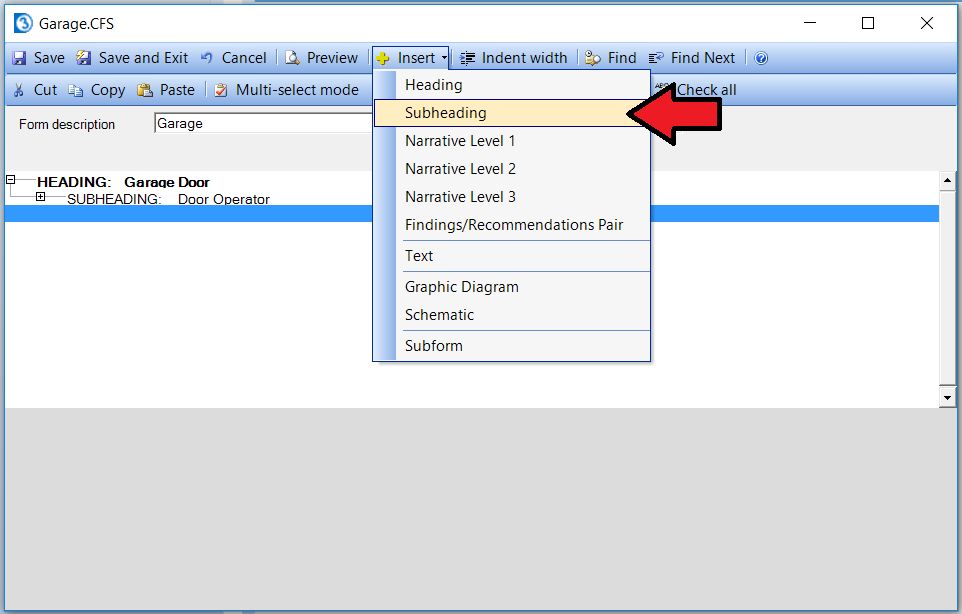
Now we'll move onto our next Subheading. You may want to click the minus symbol next to the Subheading "Door Operator" we've already filled out. This will minimize it to only show the Subheading parent item while we add our next Subheading in the correct place. Now would also be a good time to save the form.
Click on the line below the Subheading "Door Operator". Then Click the Insert button on the top toolbar and select Subheading. Please note that if you did not minimize the subheading then you would need to instead click on the blank line beneath all of the Narrative Items.
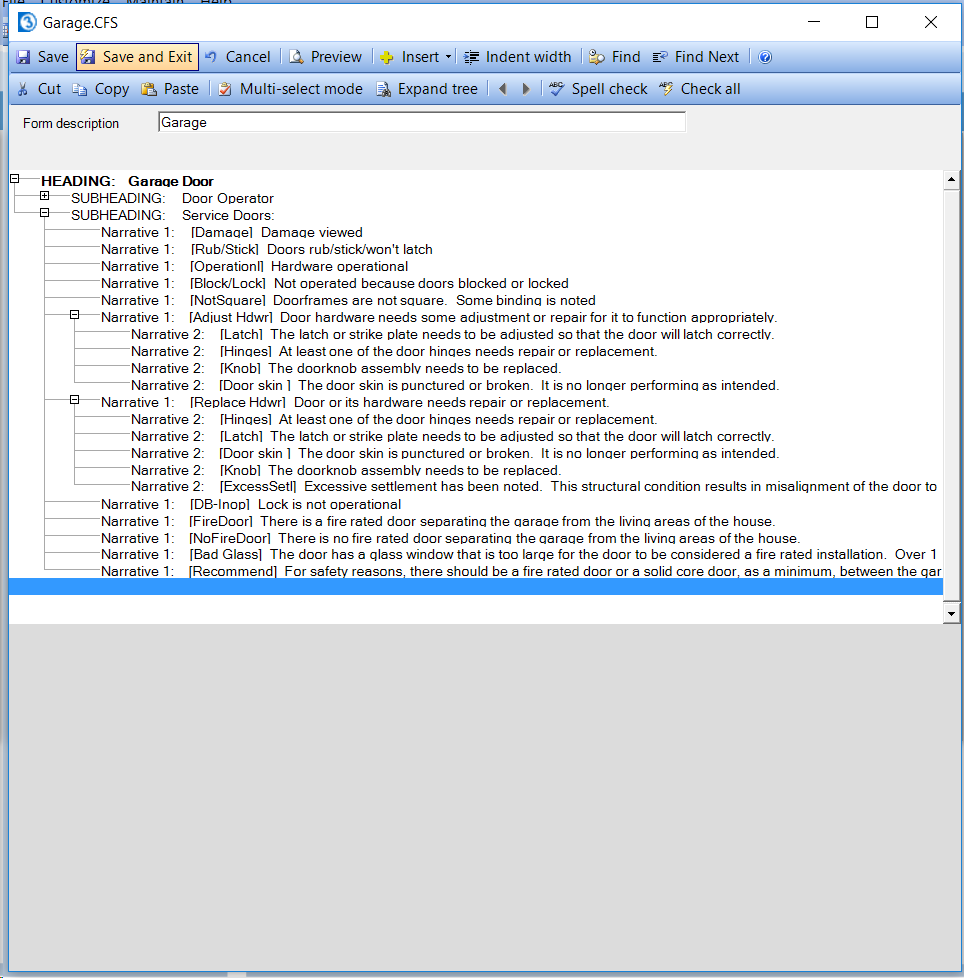
We'll name the subheading "Service Doors". Then we'll add some narratives just like we did earlier. Repeat this for as many subheadings as you want under the "Garage Door" Heading.
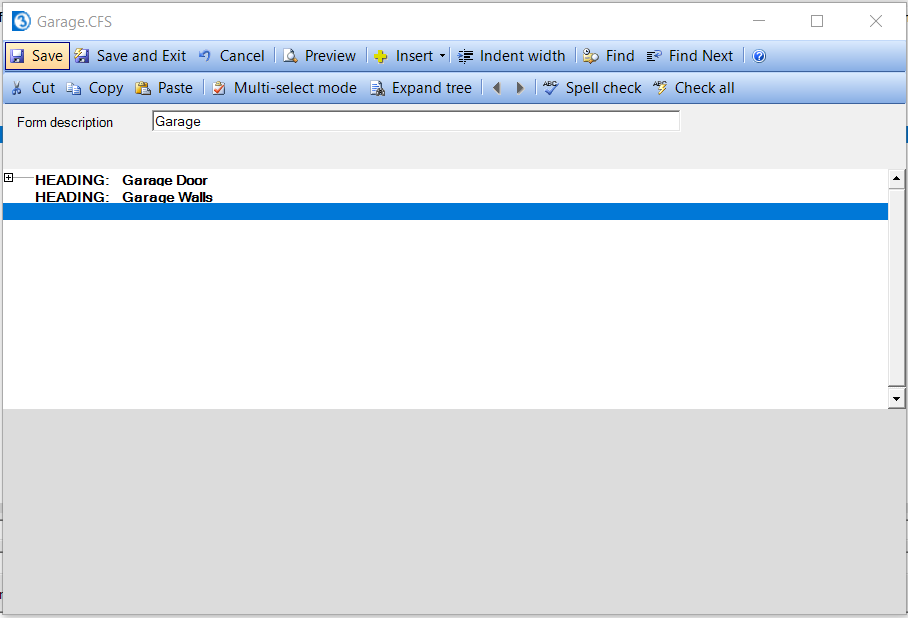
We'll now save the form again and minimize my Heading using the minus symbol. Then we'll click on the line beneath the Heading and add a new heading by clicking Insert on the top toolbar and selecting Heading.
We'll name this new Heading "Garage Walls".
You can repeat this for as many headings, subheadings, and narratives you want in the form. A useful tip to note is that you can right click headings, subheadings, and narratives to copy and paste them elsewhere within the form. Likewise you can remove them by right clicking and selecting cut.
You can also click the Multi-Select button on the top toolbar to copy and paste multiple items at once!
Now that our form is complete all we need to do is Save and Exit from it. Then you can add it to a Form Group as referenced in the tips and tricks article Custom Form Studio - Create Your Own Form Group!
Final Important Note:
The various items within a form must be in the proper order or your form group will not compile! Remember this:
1. Every form intended for use as main form should start with a Heading, text item, subform, or diagram.
2. Every Subheading should be below or attached to a Heading (unless it's in a Subform)
3. Every Narrative Level 1 Item should be attached to a Subheading.
4. Every Narrative Level 2 Item should be attached to a Narrative Level 1 Item.
5. Every Narrative Level 3 Item should be attached to a Narrative Level 2 Item.


 Need Support