The Header/Footer document controls what is included in the top and bottom of each page of the printed report. Have you ever wondered how to adjust these page headers or footers to automatically merge in standard information?
Another Working with Headers and Footers tips article already explained how to access the first page and general header and footer areas used by your inspection reports.
But how can information in those header and footer areas be set to work automatically for every report? For instance, how does it know how to merge information that changes for different reports or pages- such as page numbers, company information, site address, job name, and so forth?
This is done by including special merge fields that get replaced at final print or preview time. We'll demonstrate adding a page number as a specific example but the same principle applies to merging other information like Office Management job details.
 As a side tip, it is always a good idea before changing content to first make sure you have a current backup of your existing data files. You should be doing this regularly, and storing backups off your hard drive. That way you may easily restore a prior item should you accidentally make an unwanted change.
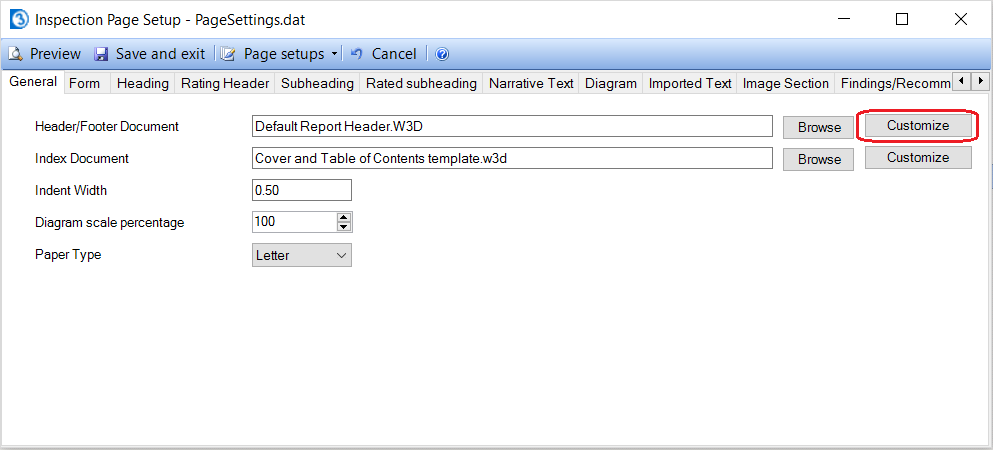
To edit the header/footer document used for your reports, first open an existing report. In the report writer, use File > Page Setup to access your print layout settings. On the General tab, the header footer document in use is listed along with a Customize button to its right. Use Customize to edit the header/footer document.
As explained in the other tips article you may only see one header and footer area since the empty document template body is used to fill the report body information later at print time. Although you may have two header and footer areas, they are not initially seen since the document template doesn't contain multiple pages itself. Often a separate first page header and/or footer would be set to print differently on the first page or cover of the final report document vs. the remaining pages. A reliable way to access the various header or footer areas is by using the Insert menu to choose the one you wish to adjust or view.
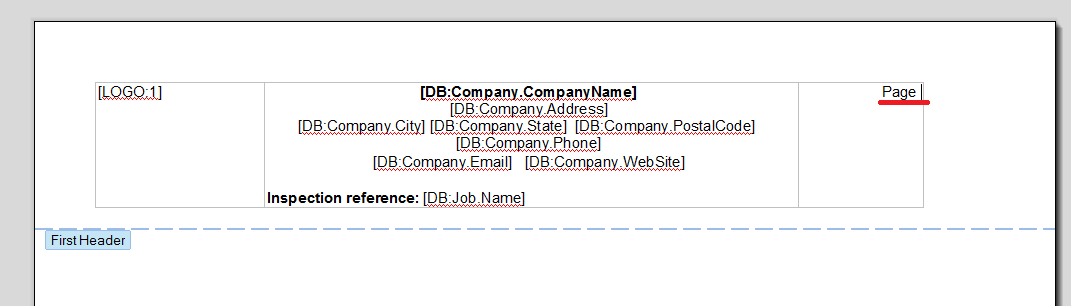
For example, suppose you wanted to adjust the first page header to add the page number to the top of the very first page of the whole final report document (possibly the cover, although many would not want a page number printing on the cover), you would choose Insert > First page header. You'll likely see the cursor appear in the "First Header" labeled area at the top of the page. You may reposition your cursor within the header where you want to add or adjust items or information. Now you may type any text that would always be the same for every report, and use the Insert menu to include information that should merge.
For instance, if you want more than just the page number itself to print, you may wish to type some explanatory text. In our example, perhaps type the word "Page" followed by a space to precede the page number field. That way instead of just printing a number like "1", it could say "Page 1"
Next use Insert > Page Number to include a page number code, and a merge field for this should appear. If you only wanted the main page number printed there, you could be done.
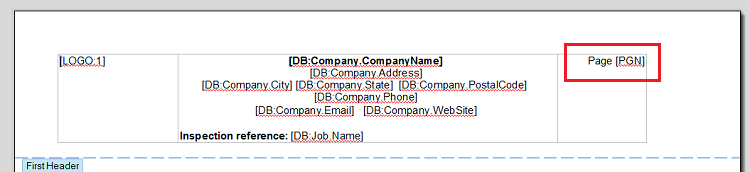
This will produce "Page 1" in the upper right corner of the printed report since this is the first page header.

The page numbering features also include an option for including the total number of pages. So we could optionally add another space after the page number field and then use Insert > Of Page _ (total pages) to insert a code for that purpose (thus producing "Page 1 of 10" for example on the printout).
Note that if modifying the "First Header" area, that only affects the first page of the final combined report document. So if you wanted to add page numbers to the header on every page after the first page, you would use Insert > Header to access the general header that is applied to all remaining pages of the report.
You may repeat similar steps to add various information to the first or general header and footer areas, by using the Insert menu to access the appropriate header or footer area, and then typing explanatory or general text or labels for items along with adding any merge fields using the Insert menu. For instance, Insert > Office Management Field accesses available items that may be merged in from office management for each job. After selecting that option, tap the plus mark to expand a grouping of information to drill down to a particular field you wish to include, such a specifics related to the job, client or other contacts, and even your own company information as needed.
When finished modifying the header/footer document, we recommend double-tapping back into the body of the document to close up the header/footer areas (at which point the general header/footer may disappear from view if the document has no body information, although still exist) and Save and Exit to update the document. If you don't wish to save the changes, you may instead close the window X and choose Not to save. Afterward, while in Page Setup, use Preview to see the results of any changes made, so you may easily tweak them further using Customize if need be.
Similar Insert options are available when editing any document template or narrative to automatically have such information merge into a regular document body or report narrative automatically. See also Import Office Management details into inspections
Thus your job specifics may be entered once into Office Management, and merged into other places automatically to handle the rest of the work for you. This is handy for creating summary, contract, or other standard documents or attachments, or to merge job specifics right into the report writer.
Follow along using the below video for adjusting your Header!


 Need Support