If you would like to add a signature image for an inspector to a report and want to make it permanent so all new reports start with the image already present, you can do that in the Custom Form Studio using the "default" narrative property in 3D Inspection System.
To add a default signature image to a form group, first open the Custom Form Studio (By clicking an action to launch if available, or using report writer File>Custom Form Studio.
Next select the form group name in the left pane to which you wish to add the signature. (The form group must be a narrative style form group and not a special graphical form that replicates a pre-printed or mandated form.)
As an example, we'll add one to the General form of the Residential Checkstyle form group.
Once the form group name is selected, use the center pane listing of Forms in the selected group and right click or double-tap the form name where you want to add it and select Edit form.
Once the form editor opens select the item in the tree below where you want the signature, and add a new subheading for the item.
Note: You will likely need to click the plus next to an existing Heading to expand it and add a new subheading under that Heading. Or you may add a new Heading and Subheading entirely for that purpose.
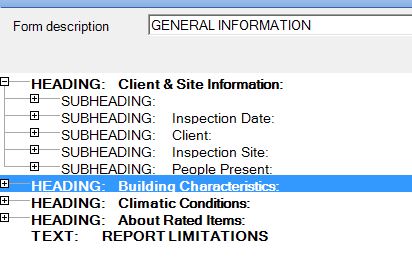
Note: In the above screenshot example the line below the People Present subheading was selected in order to add a new subheading after People Present, so it will shows up under the Heading for Client & Site Information.
Next use Insert>Subheading toolbar option to add your new item, and label the subheading "Inspector Signature" or whatever you prefer to call it.
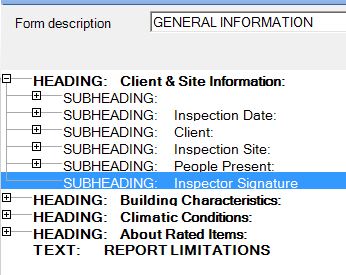
Next click the item in the tree below the new subheading and use the toolbar option Insert>Narrative level 1.
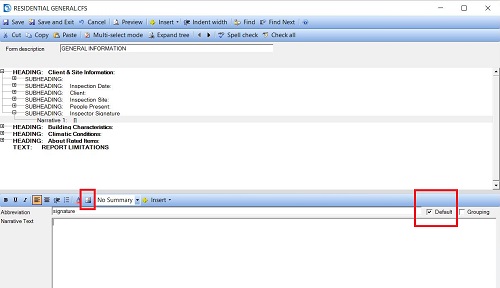
In the lower properties pane for this narrative item you might enter "sig", "signature", or your own preference for the abbreviation field, or perhaps with the inspector name.
On the far right of the lower properties pane, tick the "default" checkbox option, so this narrative is automatically selected on new reports. (Note: If the form might be used by other inspectors, you may or may not want to default the signature, as you may always select it on demand instead.)
Next left click in the narrative text field and delete any text it copied from the abbreviation there.
Next select the image icon. On the top, right click the folder icon to navigate where you saved the picture or graphic of your signature and tap ok. You should then see it in the preview window where you may tap the signature image to select it and then Save and Close.
Once you save and close, a preview of the image should appear to the right of the narrative text field.
(TIP: If you have multiple inspectors, you may add a Narrative 1 similarly below the same subheading, to later choose which inspector signature to attach to any given report.)
Next Save and exit the edit form screen to complete saving your new defaulted signature graphic narrative(s).

The final step is to right click the form group name in the left pane choose Compile Forms so you can update the form group with your changes.
Note: If there are any errors listed, the forms won't update with the changes until the error(s) are resolved and the forms compile without error.
Your new signature subheading and narrative(s) will only show up for new reports you start after this point. If you defaulted the signature, now every report you start will have that signature included automatically!


 Need Support