This page contains various print layouts or layout elements that are compatible with 3D inspection System Standard or Premier editions.
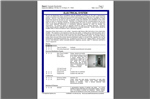
Colored Border for individual form element
Download
Instructions:
- Right-click download link above and use Save as Target to save the template file in your 3D version Documents\3D Inspection System 11\ "data" folder.
- Launch 3D Inspection System
- Switch to the Report Writer and use Preferences > Preferences to "Enable advanced features". This allows use of custom templates in Page Setup.
- Open an existing report, or start a new report.
- Click File, then Page Setup to access your layout settings.
- Select the desired element tab (for example your Form or Heading tab), and switch it to Use Template. Next select the ColoredBorder.PTL file as your template. To see an example of how it will look applied to a report, click Preview button. You may make adjustments to the template and preview again to save and view adjustments.
- To change item font size or style, highlight the [Element] field and adjust its font size or style
- To change the color of the "border" created by the outside table fill, click into the colored outside table cell and click Table > Format. Adjust background color as desired.
- To change the color of the inside cell fill color, click into that cell and use Table > Format to adjust it as desired.
- To adjust the right margins of the item, first drag the inside table cell border as desired; then drag the outside table cell as desired. The left margin of your Header/Footer document to determine its left margin positioning on your final report. Note: If you wanted a different left margin for the item (i.e. indented from the left margin), then you would want to insert a multi-column table when originally creating a template, so that the starting border of the 2nd column could be used for placing your actual item you want printed.
- To add extra space before the element prints, that is space above, first make sure your cursor is in the outside table cell. Then use Table > Split above current row to add a carriage return above the table. Next you may highlight the line, and adjust its font size to adjust the spacing.
- To add extra space after the element prints, highlight and adjust the size of the carriage return on the line after the table.
- The exact same template or a copy of it with slightly different settings (created by selecting the element and changing its name) could also be selected for printing other single page setup elements, such as the form, heading or reference text information.
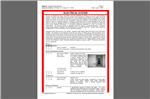
Entire Form Border Templates
These templates print all the information contained within each inspection form on a report within a colored border.
Installation instructions:
Note: Before installing any of these templates, we recommend you backup your current layout template using the Page setups... Save layout template option, found in Report Writer under File... Page Setup. That way you may restore your page settings back to their prior state, if you choose not to use templates you may have downloaded and installed.
- Download the desired templates to your computer, using the respective links in the left-hand column.
- Extract each zip file to your Documents\3D Inspection System 11\ data files folder.
- Launch 3D Inspection System.
- Open an existing report, or start a new report.
- Click File, then Page Setup
- Click on Page setups, then click on Load layout template
- Choose the desired template to load, and then click Open
After following the above steps, 3D will use the chosen template when printing or previewing your inspection report.
Click the link above the PDF example below download that template to your PC. Extract the contents of the zip file into your data files folder.
| Blue Border | Red Border | Gray Border |
 |
 |
 |
Pre-set Logo Header
This special header/footer document is designed to automatically merge your company logo into your report headers.
Download
To install the special pre-designed documents:
1. Before saving or unzipping the included files into your Data folder, as a precaution use Office Management File > Backup All Files to back up your existing layouts and documents before continuing. Note that installing these files will overwrite your existing Header/footer and index documents. Anything you customized directly in these documents might need to be set up again later.
2. Unzip or save the included files to your 3D "Data" folder location, replacing your prior header/footer and index files.
3. Open a report in the Report Writer. Use File > Page Setup to verify that the "Default Report Header.w3d" is specified as the header/footer document and the "Index Document Template.w3d" is specified as your index document there. If not, then use the Browse button to select those documents respectively. Save and Exit when done.
4. Click Preferences > Preferences, Logo tab. Use Browse to select your company logo graphic file. When done click OK. Now your report header should automatically import your company logo into the header areas of your report.
5. Preview a report to check the new look. If needed, use File > Page Setup in the report writer to further Customize your header/footer or index documents. You'll notice a special logo field is present where the logo imports automatically. See Preferences Help topic for more details about the logo field.


 Need Support