Premier editions of 3D can add user-define Views to the main Office Management screen. All editions may use the included Views. The additional visual Scheduler option in the toolbar is only available in Premier.
3D Inspection Software comes with 4 main Jobs views by default. These are: Recently Added, Jobs This Week, Jobs Last Week, and All Inspections. One may then search within the current view to further narrow down or locate a job.
Views use a Gregorian calendar Sunday to Saturday style week. However since the majority of inspections are performed during week days rather than weekends, the visual Scheduler displays full Week and Month starting with Monday, with lessor used weekend entries following. Calendar and date selection options simply use windows Regional settings week start.
On the main Office Management screen Views:
"Recently added" is based on the invoice date or job creation date, last 7 days to date. This shows jobs actually "added" to the database the most recently, so a rescheduled job that was originally added in previous weeks might not be listed here.
"Jobs this week" uses the inspection date, this week.
"Jobs last week" uses the inspection date, last week.
"All Inspections" shows all inspections in the database
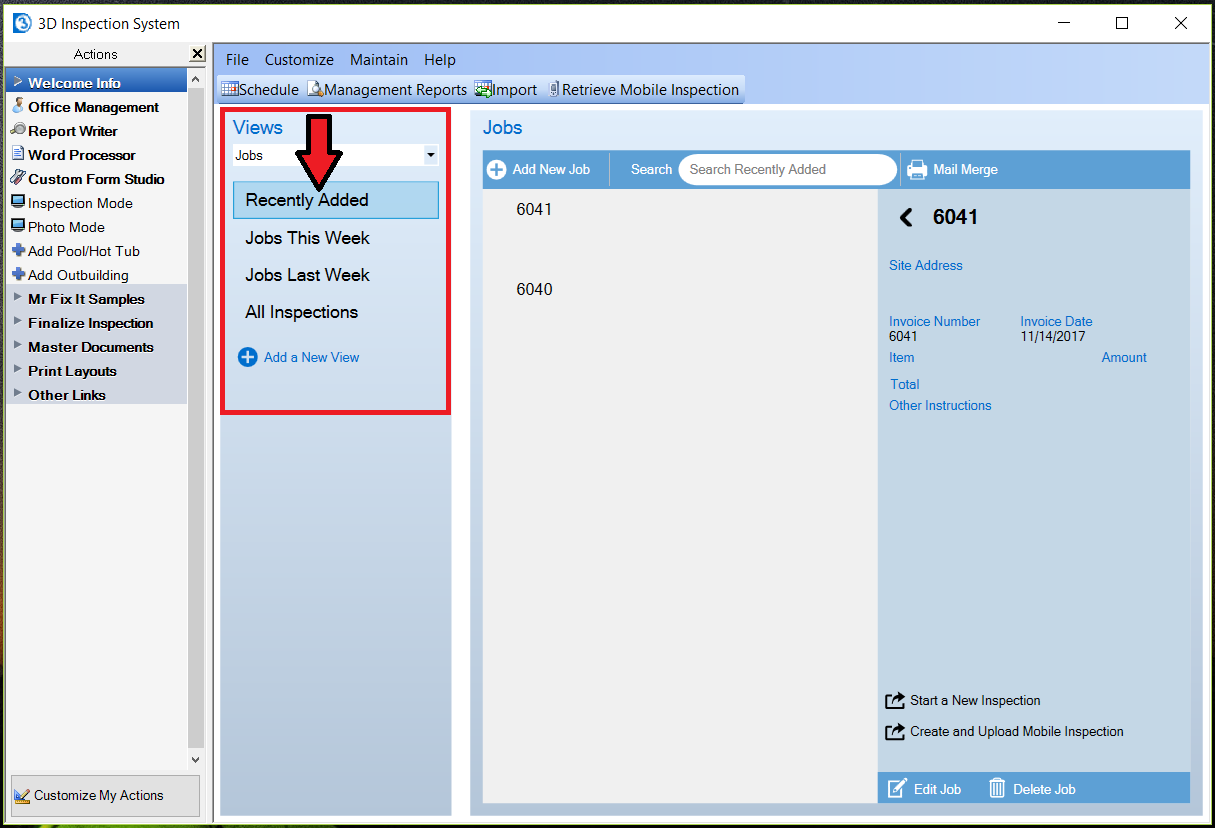
The below image shows examples of the included views. While a Recently Added view is currently selected, we can see two jobs added within the past week.
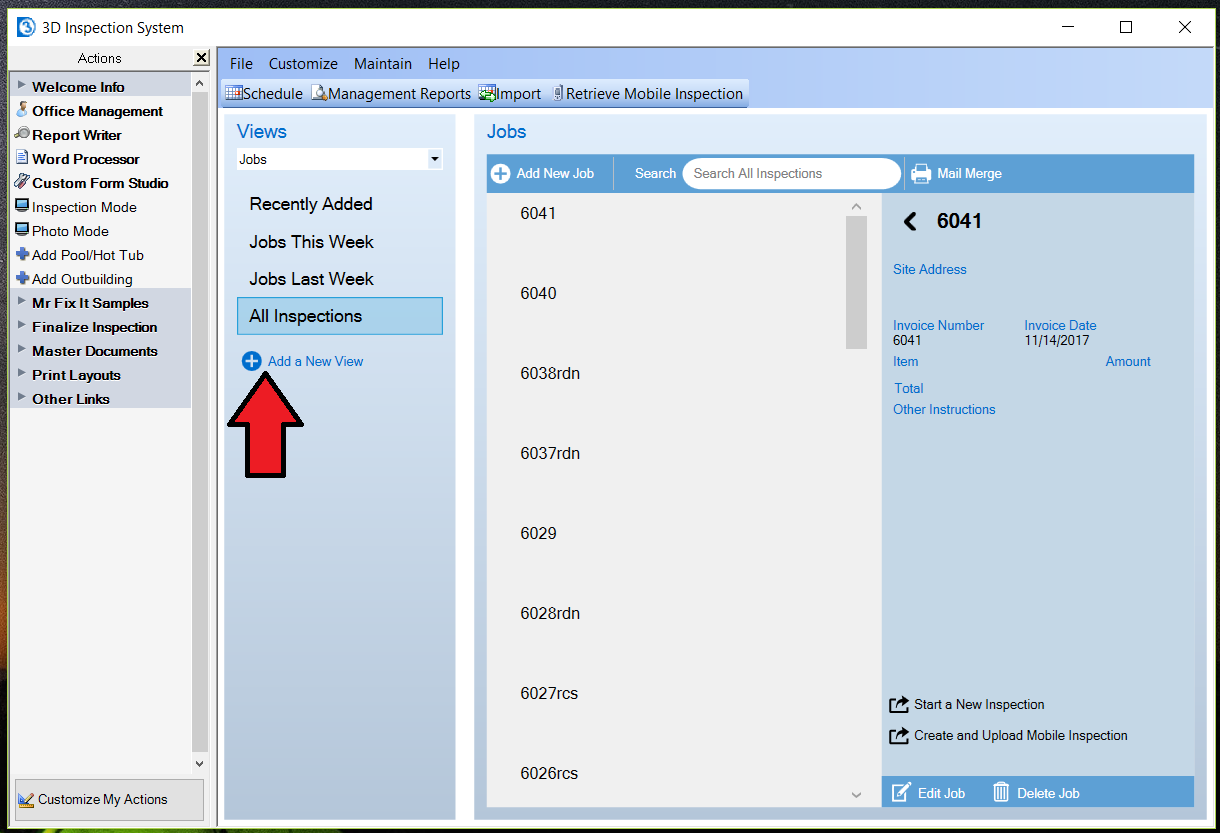
Select the All Inspections view and you'll be able to see every job created within Office Management.

If these views are not exactly what you want, and you are using a Premier edition, then you may create new custom views using the Add a New View button.
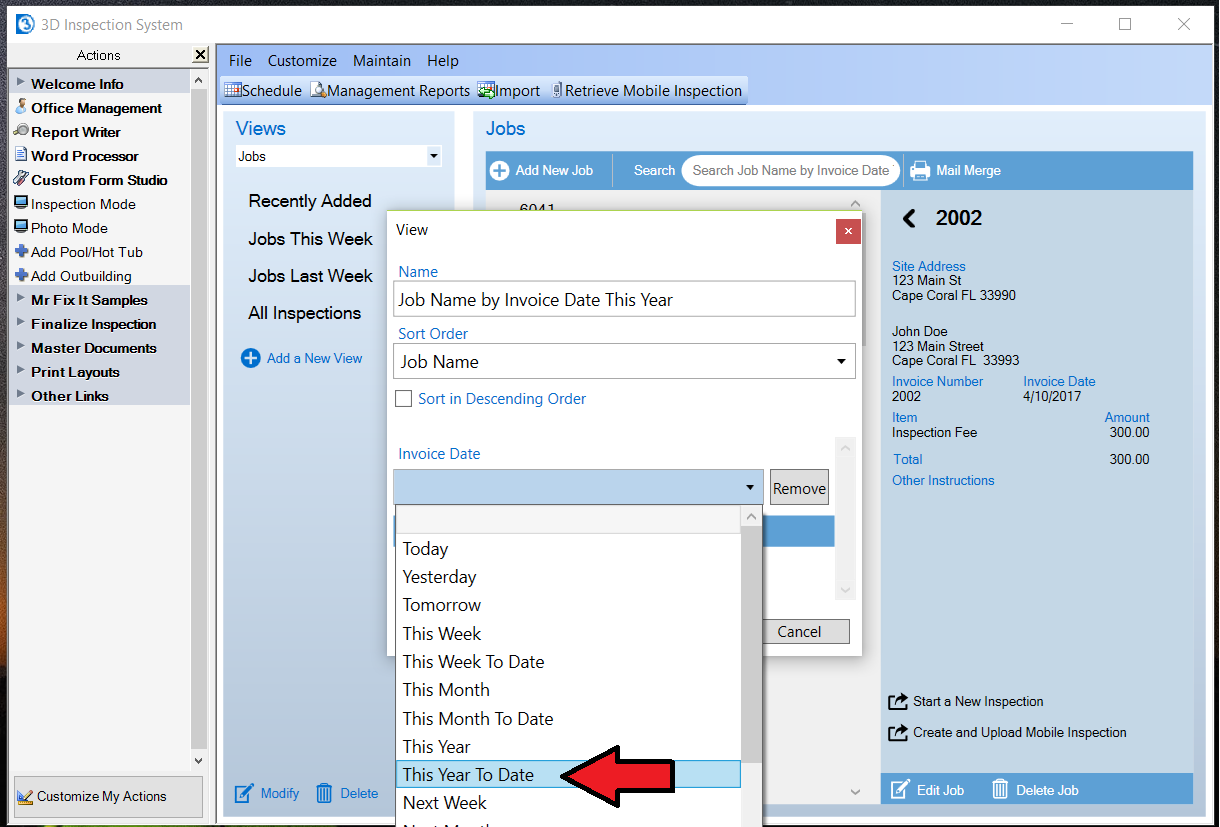
Once you've selected the Add a New View button then a new window will open. You'll want to give the view a descriptive name. For this example I'll call the view "Job Name by Invoice Date This Year".
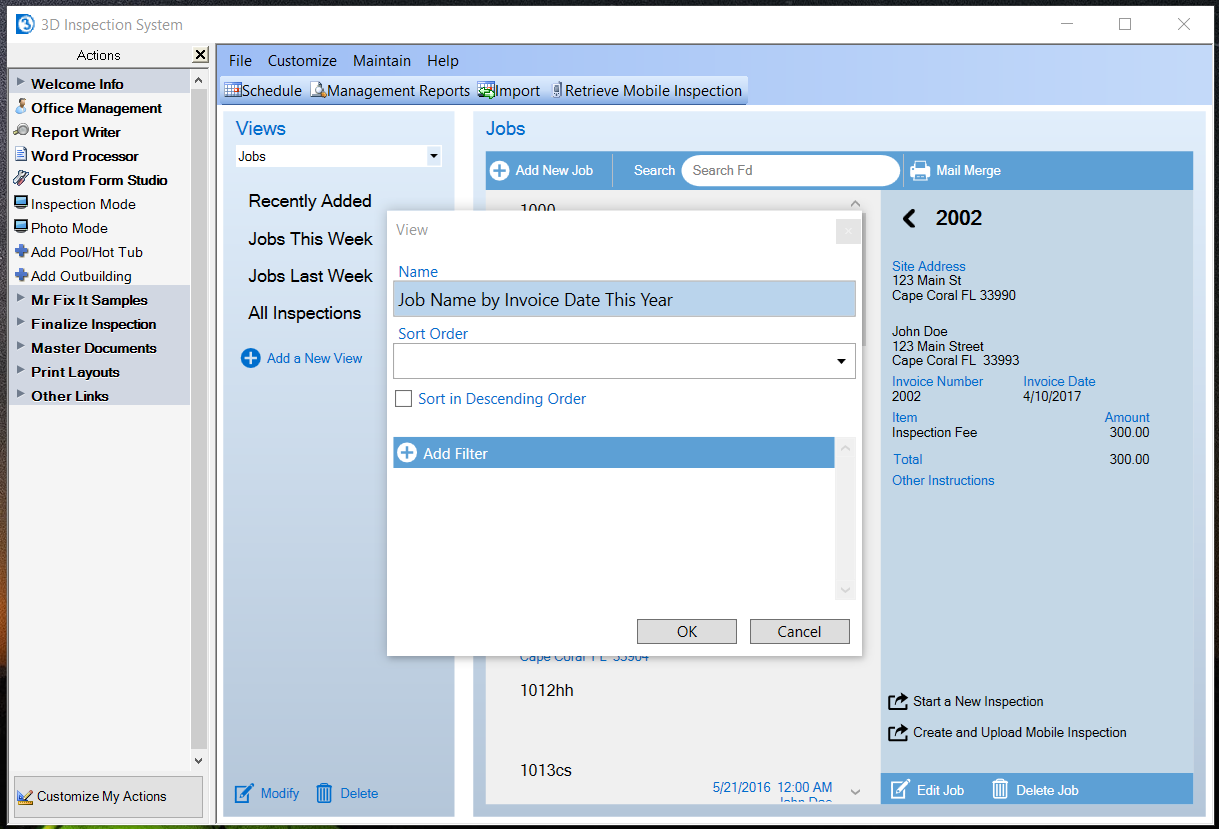
Next we'll need to specify a field by which to sort the results. Select the drop down arrow and choose the field you wish to sort by. Based on the name I chose earlier I'll be selecting the Job Name field.
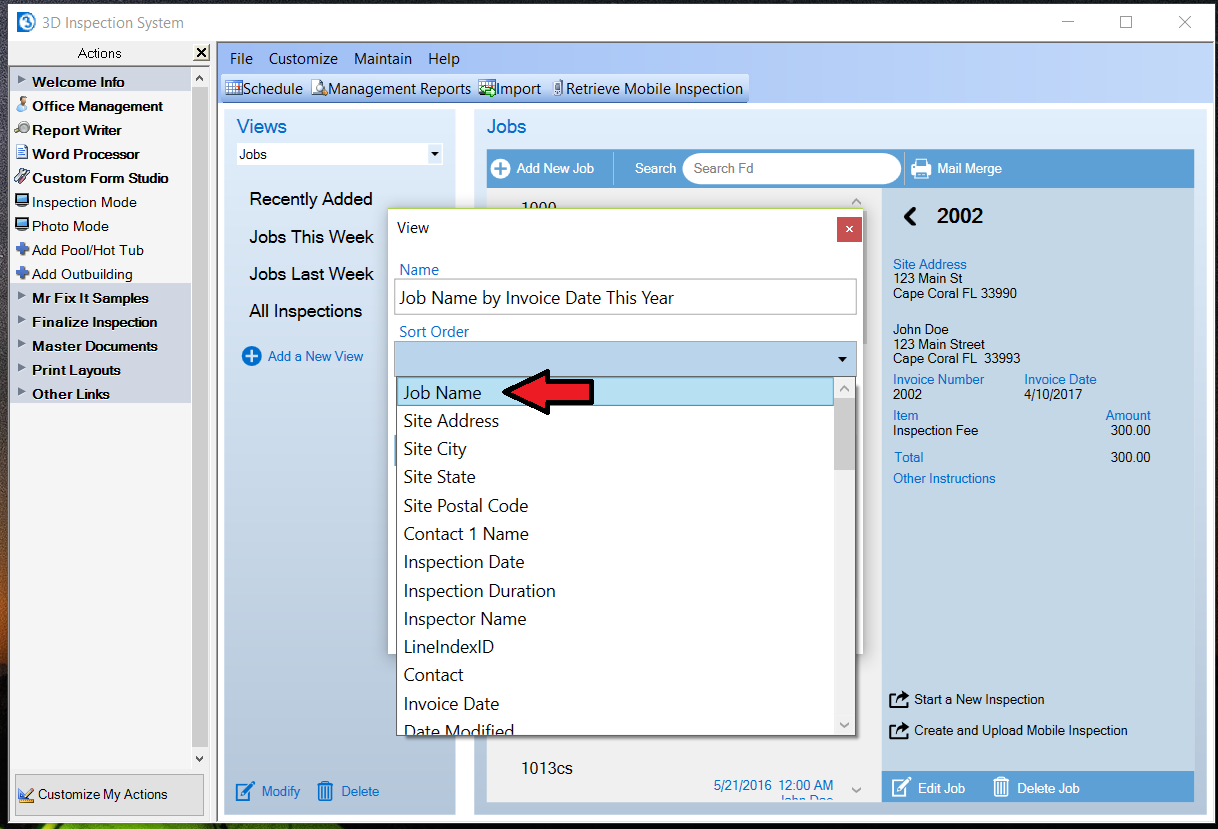
Once you've selected the field you wish to sort by you can choose whether you want the jobs to be listed in descending order or not using the check-box. This example will not use descending order.
Next you can choose to add a filter. This is optional. If you don't want a filter then you can select the OK button and you're finished. For this example I'll add a filter for Invoice Date.
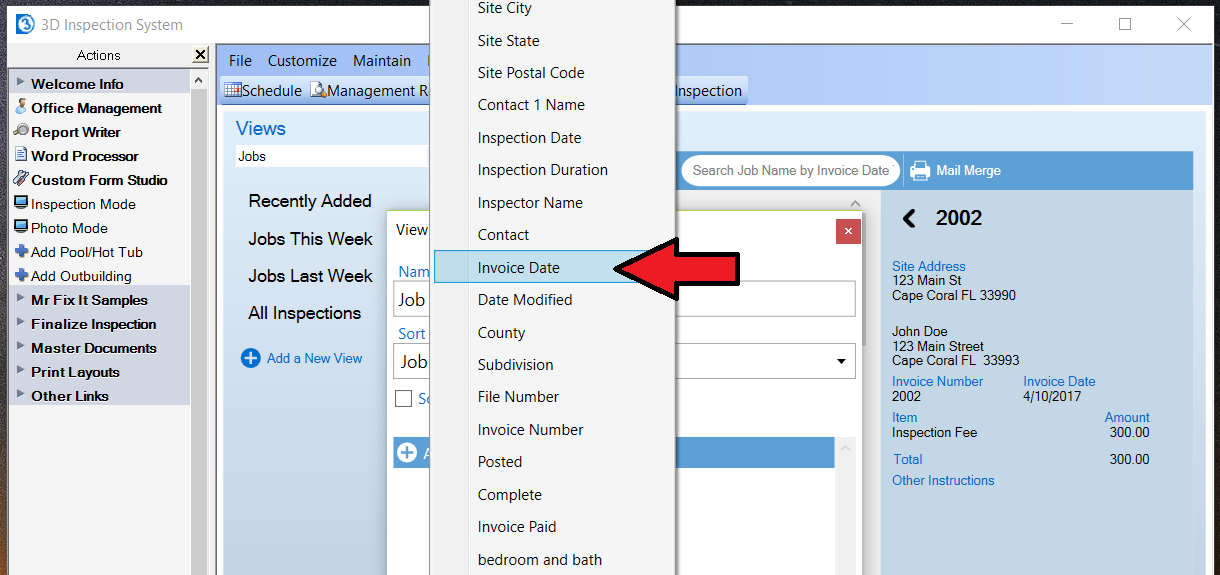
Once the filter is selected a new drop-down field for the filter appears. The new field option will vary based on the filter-type selected. Note that you can also choose to add additional filters if desired. Since I named the view Job Name by Invoice Date This Year, then I'll select the drop-down box for Invoice Date and select the option This Year to Date.
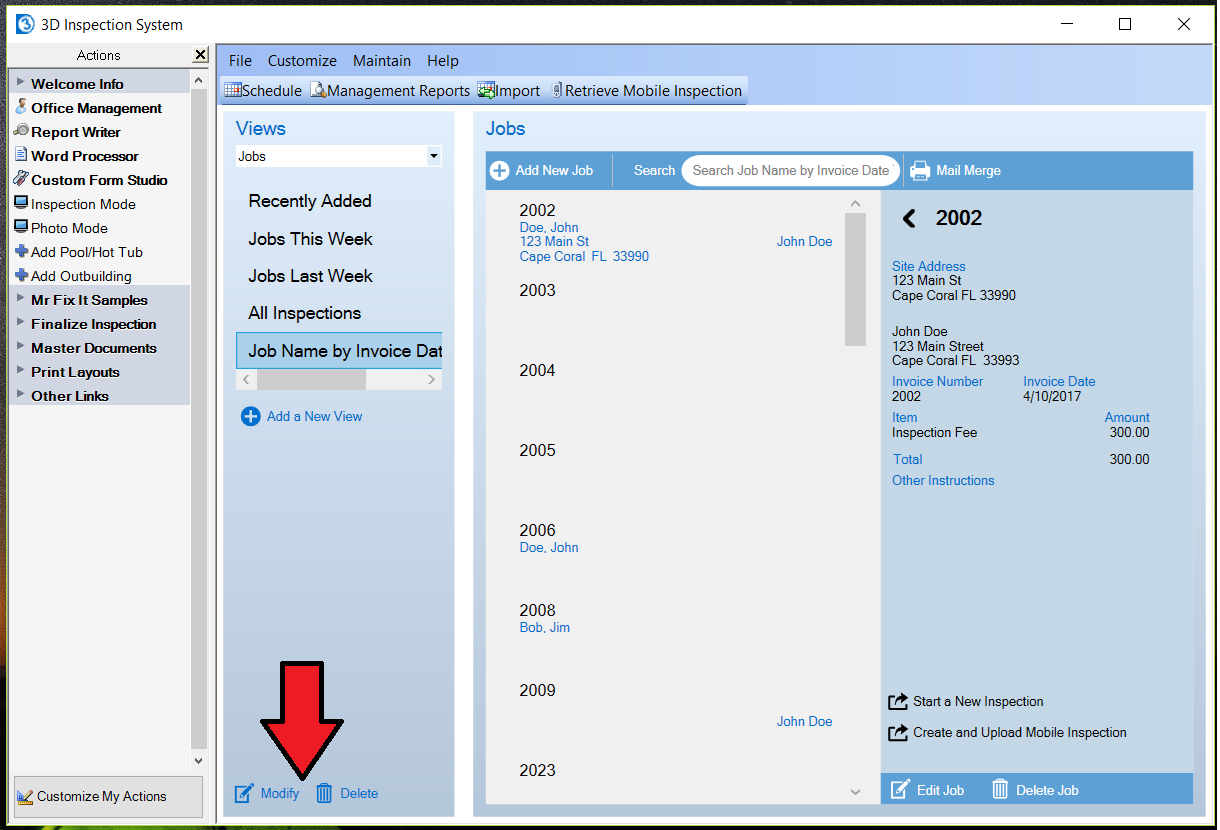
Once you're done adding any filters to your view then select the OK button. You'll see your new view appear at the bottom of the Views pane in Office Management. Select the view to use it. You'll see that the jobs in the view I created are different than the default views shown earlier. The jobs that appear in this view will be sorted in order by Job Name and only jobs with invoice dates this year will appear.

After adding your new view you might decide to modify or delete it later. This can be done by selecting the view and then selecting the Modify or Delete button at the bottom of the View pane.


 Need Support