User Community

3D Inspection Systems Logo Usage Policy

This policy provides our requirements regarding use of the 3D Inspection Systems logos, trademarks, service marks, trade dress, slogans, copyrighted designs or other brand features of 3D Inspection Systems obtained from the website (“Logos”) or other materials.

As the need to address future branding concerns arises, we may cancel, modify, or change the terms of this policy from time to time without notice to you. You, as a Logo user (“you”), are responsible for complying with any modified terms, so please review this policy and also become familiar with any modifications we publish.

The Logos are the sole and exclusive property of 3D Inspection Systems, Inc. As a general rule, third parties may not use the normal 3D Inspection System logos or trademarks. On this page are the limited circumstances under which third parties may use the 3D logo. The logos must always be used pursuant to the specifications on this page to identify 3D Inspection Systems corporation, or 3D Inspection System products or services. Any use that falls outside of these specifications is strictly prohibited.

Third parties may only use the logos without a license only under the following limited circumstances:

  • ­In advertising, marketing collateral, or a website that references your connection with 3D Inspection Systems (for example, the material states that you are an authorized distributor or reseller of specific 3D Inspection System powered products, or that your product integrates with 3D Inspection System products) provided that the correct logo that indicates the relationship as authorized by 3D Inspection Systems is used.  See examples.
  • ­In an area of a website, advertising, or marketing collateral exclusively dedicated to the sale of 3D Inspection Systems products, and in such a manner that associates licensed 3D Inspection System software with the 3D Inspection System logo.
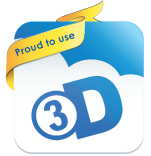
  • ­­In an area of a website, advertising, or marketing collateral indicating that one uses 3D Inspection Systems powered products or services in one's business, provided the "Proud to Use 3D" logo only is used.  Learn How.

Your use of any Logo implies acceptance of, and agreement with, the terms of this policy. If you do not accept and agree to follow the rules for using the Logos as set out in this policy, you do not have the right to use the Logos and should not use them. Any use of the Logos that does not comply with this policy is not authorized. If you violate the rules set out in this policy, you must cease all use of all Logos, regardless of the uses otherwise allowed in this policy. In addition, 3D Inspection Systems reserves the right to revoke its approval of your use of the logos at any time.

Permission is granted to you to use the Logos only when complying with all the following rules and conditions:

• Logos may only be used in marketing or other publicity materials for the benefit of 3D Inspection Systems in the United States, Canada, Australia, New Zealand, or otherwise with the permission of 3D Inspection Systems, Inc.
• Logos or the 3D Inspection System name or parts of the name may not be used in any confusing way.
• No Logo or product name may be used in any way that suggests that 3D Inspection Systems is affiliated with, sponsors, approves or endorses you, your organization, your websites, your products or your services, unless such a relationship exists.
• No Logo or product name may be used in any way that mischaracterizes any relationship between you and 3D Inspection Systems.
• Vendors may not use the Logos to advertise 3D Inspection Systems or its businesses as clients on vendor websites and promotional pieces without our written permission.
• All 3D Inspection Systems Logos are distinctive, designed pieces of graphic artwork. The following usage guidelines must be followed:
- Use only approved 3D Inspection Systems logo artwork as provided
- Do not modify or alter the Logos in any way
- Do not change the proportion, skew or rotate any Logo
- Do not animate, morph, or otherwise distort the Logo in perspective or appearance.
- Do not change the design of any Logo, including removal of any artwork
- Do not change or vary the colors of any Logo, except that the Logos may be all black or can be reversed out in white.
- Avoid screening Logos to less than 100%
- Do not shrink any Logo to less than 1” in height
- Logos may only be placed on solid backgrounds and not over an image or pattern, and no artistic effects (such as dropshadows, gradients) may be applied.

- Do not combine a Logo with any other design, trademark, graphic, text or other element, including your name, any trademarks or any generic terms, slogans, numbers, design features, or symbols
- No other design, trademark, text, graphic or other element may be placed closer to a Logo less than one half the width of the Logo, and should be clearly separate from the Logo.  The logo must not be incorporated or used in any manner as part of, or in close proximity to another company's name, domain name, product or service name, logo, trade dress, design, slogan, or other trademarks. The logo must never appear with any other symbol or icon; contained within a box, circle, or other shape; or combined with any other name, logo, or icon to create a co-branded logo.
- The logo or 3D trademarks or portions thereof may not be used in any manner that might imply that any non-3D Inspection Systems materials, including but not limited to goods, services, websites, or publications are sponsored, endorsed, licensed by, or affiliated with 3D Inspection Systems.
- The logo may not be displayed as a primary or prominent feature on any non-3D Inspection Systems materials. Companies using the logo pursuant to these guidelines must also display in the primary and more prominent position, their own logo(s), business name, product names, or other branding.
- The logo may not be imitated or used as a design feature in any manner. 
 

• No Logo may be used or displayed in any of the following ways:
- in any manner that, in the sole discretion of 3D Inspection Systems, discredits or disparages its Brands or tarnishes its reputation and goodwill;
- in any manner that infringes, dilutes, depreciates the value, or impairs the rights of 3D Inspection Systems in the Logos;
- in any manner that is false or misleading;
- in connection with any pornography, illegal activities, or other materials that are defamatory, libelous, obscene, or otherwise objectionable;
- in any manner that violates the trademark, copyright or any other intellectual property rights of others;
- in any manner that violates any law, regulations, or other public policy; or
- as part of a name of another company name, product name, service name, domain name, website title, publication title, or the like. This applies to the logo or 3D Inspection System name or any components that would associate the item with 3D Inspection Systems company or products.


• Non-3D Inspection Systems materials should not mimic any 3D Inspection Systems advertising, product packaging, or website design.
• Written materials, such as web pages, must be marked to indicate that the Logos used are owned by 3D Inspection Systems or its affiliates (for example by using a statement such as, “the 3D Inspection Systems logo is a trademark of 3D Inspection Systems, Inc.”).

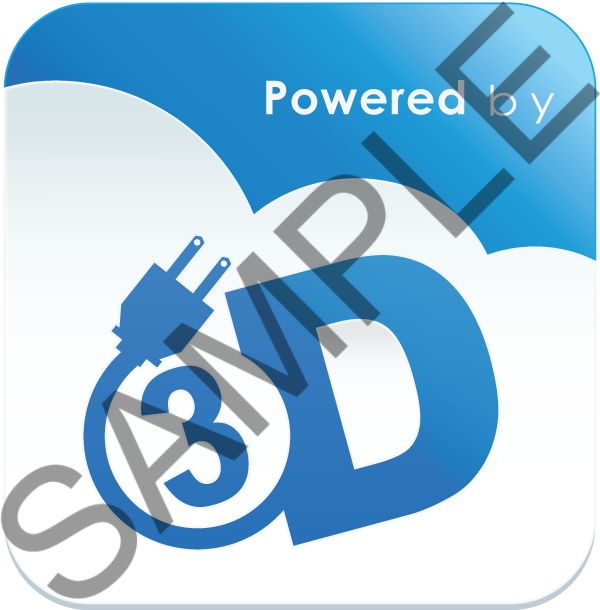
• Written materials or product names should not use the 3D logo or any trademarks or portions thereof (for example the text "3D") as part of the official name of any related, bundled, or add-on product designed to work with 3D software. Bundled products or content may be indicated as being "Powered by 3D" or designed for use with a particular 3D Inspection System software edition, provided endorsement by 3D Inspection Systems is not implied.
• All goodwill generated by the use of any Logo inures to the benefit of 3D Inspection Systems. You may not assert rights to any Logo whether by trademark registration, domain name registration or anything else.
• You must, upon request from 3D Inspection Systems, provide samples of any materials that include the Logos for purposes of determining compliance with this policy.
• You must make any changes to your use of the Logos that are requested by 3D Inspection Systems.
• Your download and use of the Logos is subject to the 3D Inspection Systems Site Terms.  Please check with 3D Inspection Systems as to the proper logo to use for your situation.
• Business partners who have agreements with 3D Inspection Systems must comply with the terms of their agreement in addition to this policy.
If you’d like to make any use of our Logos or trademarks that is not covered by this policy, or for further information or clarification about use of the Logos, please contact us Here.


3D Inspection Systems, Inc. reserves the right in its sole discretion to terminate or modify permission to display the logo, and may request that third parties modify or delete any use of the logo that, in 3D Inspection System's sole judgment, does not comply with these guidelines, or might otherwise impair 3D Inspection System's rights in the logo. 3D Inspection Systems further reserves the right to object to unfair uses or misuses of its trademarks or other violations of applicable law.

Get Started Guides

Learn about newer features & changes when version 12 series were released.
Learn about Networking

Learn your installed version using Help > About.  Users of older major versions (the 2nd number in the version number) or non-subscribers may need a new version series upgrade installer to receive new features or support.


 3D Mobile Inspector / Tablets / Phones 

Set up companion mobile apps by (1) Get mobile app from your device store, (2) sign up for Cloud3D Services (free to subscribers), and (3) wait for confirmation email that Cloud3D Services is activated and use Office Management to upload and retrieve jobs-
 3D Mobile setup step by step  
 Mobile app related articles


Other Resources

Video Channel

Learning Portal

User Community

Celebrating 25 Years

Join us in celebrating Great Moments in Technology Innovation.  View the timeline below to learn about both general and 3D Inspection System software advances.


As 3D Inspection Systems celebrates its leadership role in innovating inspection solutions over the past 25 years, we also celebrate notable advances in computing and portability technology, and other industry-shaping events.

 B.C.


From early times, innovators pursued easier to use, more compact technology. Centuries passed before technology reached the portability and affordability of today.

 1971

Texas Instruments releases first easily portable electronic calculator.

 1972-
 1974

ATARI founded; Pong released. Microprocessors for computers. ARPANET created, forerunner to Internet.

 1975

Microsoft founded by Bill Gates & Paul Allen


American Society of Home Inspectors (ASHI) established. Carl Fowler later became early 410th member.

1976

 1976

Apple Computer, Inc. founded by Steve Wozniak & Steve Jobs. 

 1978-
 1981

Intel introduces new processors. Arcade  game 'Space Invaders' starts video game era. Commodore VIC-20.  MS-DOS/PC-DOS developed.

Carl Fowler begins doing home inspections; tired of spending nights typing, he invests in a KayPro and uses the WordStar word processor.

Florida Association of Building Inspectors, Inc. (FABI). est., with Carl Fowler as one of its founding members.

Carl Fowler serendipitously meets Charles Cubbage, who programs ATARI games, at a party. Charles agrees to write a custom program, which Carl begins using for his inspection reports.


1984

 1982-
 1984

Commodore 64, IBM Compaq Portable, IBM XT, IBM AT released. KayPro II 26-pound "portable" computer released

 1985

Microsoft Windows GUI development starts

National Association of Home Inspectors, Inc. (NAHI) established

Society of Accredited Marine Surveyors  (SAMS) established

1987

 1987

Developed cooperative by IBM and Micosoft as a successor to DOS, IBM releases OS/2, capable of swapping and multitasking, and running of DOS executables.   IBM and Microsoft later part ways.

3D Inspection Systems (Describe-Disclose-Disclaim) began in 1987, as an effort by early home inspection industry leaders to develop the first professional quality, narrative report writing software for the home and building inspection industry. Carl Fowler is primary founder.


 VGA released for PS/2 by IBM.
 

 1988

IBM PS/2 Model 30 286 released, based on 80286 processor and AT bus

 1989

World Wide Web invented by Tim Berners-Lee to benefit physicists, integrating hypertext and the Internet. Widespread popularity and access didn't start until 1993.

GRiD Computing: first pen-based computer.

International Association of Certified Home Inspectors (InterNACHI) est.

1990

 1990

Windows 3.0 introduced, DOS compatible.


 1991

KODAK PROFESSIONAL DCS digital camera debuts. At $20,000-$25,000, fewer then 1000 units sold between 1991-1994.

MS-DOS/PC-DOS 5.0 also released.

 1992

Windows 3.1 sells a million copies in its first 2 months. First retail CD-ROM debuts.

3D Inspection Systems bundles and sells portable GRiD computers pre-loaded with 3D software to inspectors.


1993

 1993

Commercial providers allowed to sell internet connections to individuals.

Microsoft.com goes online.  NT begins.

GRiD Convertible Notebooks running Windows 3.11 for mobile use released. Unique design folds screen over keyboard for use as a tablet with special pen.

Apple introduces Newton MessagePad.


 1995

Windows 95 launched by Microsoft.

3D explores digital pictures in reports; Real estate agents highly impressed.

3D features include customizable forms, colored text, report scrolling, application tabs, document features.

1996

 1996


First digital cameras, like the Kodak DC40, finally available at sub-$1000 pricing.

3D Inspection Systems releases its first version designed specifically for Windows95. 

1997

 1997

IBM's Deep Blue beats reigning World Chess Champion, Garry Kasparov, in a full chess match.

Microsoft bails Apple out of serious financial trouble after 18 months of losses, buying 100,000 non-voting shares worth $150 million.

3D Inspection Systems launches first website 

1998

 1998

Apple released iMac, back on road to profitability.

Microsoft released Windows 98, with support for USB and disk partitions greater than 2.1 GB, and far better hardware drivers support.

3D creates mobile software for use on hand-held Pocket PCs to collect field data

2000

 2000

Windows 2000 launches, Windows ME for the home market, Pocket PC 2000 (based on Windows CE 3.0) released.

3D Inspection Systems expands website

2001

 2001

Windows XP released, becoming one of the most popular operating systems in history, and Microsoft's longest flagship operating system.

Windows XP finally merged the NT/2000 and 95/98/ME families together, becoming mainstream for business and consumers alike.

Although Microsoft produced its final service pack for XP in 2008, and officially ended mainstream support in 2009, it is still in use on many computers today.


3D’s version 5 single-click “Actions” pane revolutionizes access to favorite documents, forms, summaries, images, standard paragraphs, text, etc.

2002

 2002

Windows "Tablet PC" debuts, with touch screen and handwriting recognition,  nearly eliminating need for a keyboard and mouse.

Mac OS X released

Pocket3D software for Windows Mobile has new interface & form editing capabilities. Version 6 of 3D introduces Client Server option for use with SQL, & 3D website is redesigned 
 

2003

 2003

Windows Mobile 2003 released by Microsoft, starting a new "Windows Mobile" line of PDAs to replace older CE and Pocket PC lineup.

Microsoft also launches Windows Server 2003, a more friendly and performance improving update to Windows Server 2000, descendant of NT.

Apple opens iTunes store.
Skype VoIP goes public.


3D Version 7 adds major on-the-fly master form editing capabilities, and images can be inserted from memory directly into Pocket3D.

2004

 2004

 Google introduces Gmail

3D Inspection Systems develops a mobile app for Palm OS, which doesn't succeed due to device fragmentation and Windows Mobile surpassing Palm abilities. Pocket3D now includes bookmarks, inspector notes, etc. 

3D Version 9 brings Office Management abilities to all editions, one-click data Backup, report upload delivery, new program panes, and more. Less expensive Focus solutions introduced for new inspectors and specialized industries.

2005

 2005

Windows Mobile 5.0 released by Microsoft, and is later updated again in 2007 to Windows Mobile 6.  Expanded variety of new PDAs become available.


3D Inspection Systems redesigns website


2006

 2006

Apple announces Boot Camp, which will allow their users to run the popular Windows XP operating system on their computers.

Amazon.com opens Amazon Web Services (AWS) to provide cloud server space and traffic scalable to businesses with changing needs.

Microsoft releases it's portable media player Zune.

New 3D feature allows printing inspection data in a different order than collected.

2007

 2007

Windows Vista released.

First iPhone unveiled by Apple, exclusive to AT&T in the US, and with private app store.

Version 11 series provides a turning point in new print, PDF indexing, image, and export options, automated sentence completion and observation grouping, and expanded on-the-fly form editing abilities on PDAs.

2008

 2008

Android OS phones introduced, later gaining in popularity 2010 onward with release of version 2.2+


3D website undergoes major renovation consistent with its current design and expands content.

2009

 2009

Windows 7 released. Windows Mobile 6.5.1 brings finger-friendly user interface.

3D Inspection Systems releases new Phone3D mobile app for the clean and easy Windows Phone 7.

New Cloud3D Services allow simple over the air report transfer between devices.
 

2010

 2010

iPad first released, popularizing limited-function multimedia tablets.

Windows Phone 7 family released.

First Android tablets also appear.

3D Inspection Systems releases new mobile app for Android phones and tablets.

An untold variety of lightweight tablets are available for easy mobile inspecting, including popular 7" and 10" sized models.  Photos can be taken directly with Android tablets or phones or Windows Phones right into reports.

2011

 2011

Android devices capture #1 spot in global marketshare of all "mobile" OS platforms.

500 million+ licenses Microsoft sold to date is more than all of the Macs, iPhones, iPads, and Android-based devices that have been sold, combined.  Microsoft prepares for Windows 8.

3D Inspection Systems celebrates its Silver Anniversary! After 25 years of leading the inspection reporting software industry, we are proud to continue working hard to implement modern technology to save inspectors time and effort.

Thanks for taking this journey with us down memory lane.

2012

 2012

We look forward to see what new technologies will bring to the table as the decade progresses.


With no other inspection software company as experienced as 3D, our innovations are often imitated, but never quite duplicated!


  Happy Anniversary 3D!


Print Layouts

This page contains various print layouts or layout elements that are compatible with 3D inspection System Standard or Premier editions. 

Colored Border for individual form element 

This template uses tables to produce a colored border or frame effect around a Form, Heading, or automatic form Text item.
Colored Border Example
Download
Instructions:
  1. Right-click download link above and use Save as Target to save the template file in your 3D version Documents\3D Inspection System 11\ "data" folder.
  2. Launch 3D Inspection System
  3. Switch to the Report Writer and use Preferences > Preferences to "Enable advanced features". This allows use of custom templates in Page Setup.
  4. Open an existing report, or start a new report.
  5. Click File, then Page Setup to access your layout settings.
  6. Select the desired element tab (for example your Form or Heading tab), and switch it to Use Template. Next select the ColoredBorder.PTL file as your template. To see an example of how it will look applied to a report, click Preview button. You may make adjustments to the template and preview again to save and view adjustments.
Here's how you may adjust certain information in the downloaded template:
  • To change item font size or style, highlight the [Element] field and adjust its font size or style
  • To change the color of the "border" created by the outside table fill, click into the colored outside table cell and click Table > Format. Adjust background color as desired.
  • To change the color of the inside cell fill color, click into that cell and use Table > Format to adjust it as desired.
  • To adjust the right margins of the item, first drag the inside table cell border as desired; then drag the outside table cell as desired. The left margin of your Header/Footer document to determine its left margin positioning on your final report. Note: If you wanted a different left margin for the item (i.e. indented from the left margin), then you would want to insert a multi-column table when originally creating a template, so that the starting border of the 2nd column could be used for placing your actual item you want printed.
  • To add extra space before the element prints, that is space above, first make sure your cursor is in the outside table cell. Then use Table > Split above current row to add a carriage return above the table. Next you may highlight the line, and adjust its font size to adjust the spacing.
  • To add extra space after the element prints, highlight and adjust the size of the carriage return on the line after the table.
  • The exact same template or a copy of it with slightly different settings (created by selecting the element and changing its name) could also be selected for printing other single page setup elements, such as the form, heading or reference text information.


Entire Form Border Templates

These templates print all the information contained within each inspection form on a report within a colored border.

Installation instructions:

Note: Before installing any of these templates, we recommend you backup your current layout template using the Page setups... Save layout template option, found in Report Writer under File... Page Setup. That way you may restore your page settings back to their prior state, if you choose not to use templates you may have downloaded and installed.

  1. Download the desired templates to your computer, using the respective links in the left-hand column.
  2. Extract each zip file to your Documents\3D Inspection System 11\ data files folder.
  3. Launch 3D Inspection System.
  4. Open an existing report, or start a new report.
  5. Click File, then Page Setup
  6. Click on Page setups, then click on Load layout template
  7. Choose the desired template to load, and then click Open

After following the above steps, 3D will use the chosen template when printing or previewing your inspection report.

Click the link above the PDF example below download that template to your PC. Extract the contents of the zip file into your data files folder.

Blue Border Red Border Gray Border


Pre-set Logo Header

This special header/footer document is designed to automatically merge your company logo into your report headers.
Download

To install the special pre-designed documents:

1. Before saving or unzipping the included files into your Data folder, as a precaution use Office Management File > Backup All Files to back up your existing layouts and documents before continuing. Note that installing these files will overwrite your existing Header/footer and index documents. Anything you customized directly in these documents might need to be set up again later.

2. Unzip or save the included files to your 3D "Data" folder location, replacing your prior header/footer and index files.

3. Open a report in the Report Writer. Use File > Page Setup to verify that the "Default Report Header.w3d" is specified as the header/footer document and the "Index Document Template.w3d" is specified as your index document there. If not, then use the Browse button to select those documents respectively. Save and Exit when done.

4. Click Preferences > Preferences, Logo tab. Use Browse to select your company logo graphic file. When done click OK. Now your report header should automatically import your company logo into the header areas of your report.

5. Preview a report to check the new look. If needed, use File > Page Setup in the report writer to further Customize your header/footer or index documents. You'll notice a special logo field is present where the logo imports automatically.   See Preferences Help topic for more details about the logo field.

Sending files to Technical Support

 
When submitting a ticket to support, or adding a comment to an existing ticket, you may use the Attachments area to include certain types of files to aid troubleshooting (such as gif, png, jpg, pdf, zip, txt, r3d, w3d, 3df, dat, ltp)
 
For help with report formatting, attach these files (Access files using report writer Preferences > Preferences, File Locations tab Data location, usually Documents\3D Inspection System 11\ ):
a) pagesettings.dat file from your data folder.
b) header/footer document .W3D file listed in report writer File > Page Setup, General.
c) index document .W3D file listed in report writer File > Page Setup, General.
d) A PDF printout showing the problem.  Please mention the page and section.
e) Your original .r3d report file having the problem.  Close report before uploading.
f) A 3DF backup of your forms.  In report writer File > Custom Form Studio, right-click your form group and choose Backup/Distribute to create a 3DF
 
You may wish to zip data files before attaching:
In the report writer Preferences > Preferences, File Locations tab, choose "Open Folder" for Data files.  Leave File Explorer open, but cancel the Preferences window and close the 3D software.
In Explorer, hold the CTRL key to select multiple files.  Once the desired files are selected/highlighted, depress CTRL and right-click one of the highlighted items.  Choose Send to > Compressed (zipped) folder.  Enter a name for your compressed or zip file.
When submitting your question to 3D, use Attachments to Browse to the folder and select the ZIP file you created.  

Proud to Use 3D Logo

If you use our software, and would like to let your clients and agents know that you use the top inspection software, or to recommend 3D Inspection Systems software to other inspectors, please copy the code below and paste it into your web site using your favorite web site editor:

<a href="http://www.3dinspection.com" target="http://www.3dinspection.com"><img src=http://www.3dinspection.com/images/we_use_3d.png width="160" height="156" border="0"></a>

If you use the code above, then the following graphic should appear on your site.


Proud to Use 3D Logo


When a visitor clicks the link, it will direct them to our web site for further information on our products, and let them know you chose the best software tool for your inspection reporting. Thank you for participating in the "Proud to Use 3D" logo campaign.

You may also want to include a sample PDF report on your website to represent your offerings and further distinguish yourself to potential clients and agents.  You can easily create a PDF report from 3D by printing to "PDF Document" or previewing and using Save > PDF.  If you wish to create a sample from a particular inspection report you produced, you may wish to use File > Save As in the report writer to save your inspection to a new filename where you may then remove or change personal or identifying report information to something generic. See How to create a sample report


 Approved vendors, resellers, or affiliates may also use a specially designed "Connected", "Alliance Partner" or "Powered by" 3D logo.


"Alliance partner" logo is generally designed for use by 3D product resellers, focus developers, and other similar authorized affiliates for general use

"Connected" logo is generally designed for vendors who have products that interface with 3D software, such as online schedulers or similar products that import or export data.

"Powered by" logo may be used to designate focused content that works along with the 3D software engine.

Please contact 3D Inspection Systems to obtain appropriate artwork or files.  See also our Logo Usage Policy.

Subcategories

General questions about the 3D Inspection software.

Select a news topic from the list below, then select a news article to read.

Select a news topic from the list below, then select a news article to read.

3D Focus is a bundled software solution from 3D Inspection Systems, Inc. that's focused on your needs.

It features...

  • Geographically specific forms
  • Various reporting styles and formats
  • A complete software solution that's easy to use
  • An upgrade path to 3D Inspection System and 3D Inspection System Premier

Learn More...Franchise Opportunities

The 3D Inspection System is a powerful report writing engine used in many inspection industries...

Please choose your profession below to learn about solutions designed for you.

Our Affiliate Marketplace.

  • Military personnel, veteran, or first responder?  Contact Sales to ask about a special discount.
  • Have a Subscription Plan? Ask about discounts exclusively available to subscription members.
  • Is money tight? Ask about our payment plans for Standard and Premier, or lease to own!
  • Need to expand to include a new branch location or inspector?  Please contact sales about any applicable discounts.
 
*Specials cannot be combined with other offers or email specials. All prices are USD. Sales tax applicable on Florida orders. Some exclusions may apply.
** Note that if upgrading from anything older than 11.4, you may opt to start with a fresh Office Management database (most prior customized inspection forms can convert) or our support team may be able to convert your old jobs database for a nominal fee. Contact Sales for details.


IF NO SPECIALS ARE LISTED BELOW, PLEASE CONTACT THE SALES DEPARTMENT TO INQUIRE ABOUT THIS MONTH'S SPECIALS: 800-745-6126, OPTION 2 (International +1 239 652 0871, Ext 2)


Page 2 of 3

Search

download buttons

Poll

How has COVID affected your inspection or marine survey business?

1494677676 [{"id":"25","title":"Has remained slow the entire time","votes":"85","type":"x","order":"1","pct":14.24,"resources":[]},{"id":"26","title":"Started slow, but ramping up now","votes":"54","type":"x","order":"2","pct":9.05,"resources":[]},{"id":"27","title":"Business remained steady","votes":"81","type":"x","order":"3","pct":13.57,"resources":[]},{"id":"28","title":"Busier than ever","votes":"159","type":"x","order":"4","pct":26.63,"resources":[]},{"id":"29","title":"Expanded or planning to expand my business\/inspectors","votes":"39","type":"x","order":"5","pct":6.53,"resources":[]},{"id":"30","title":"Reduced or planning to reduce my business\/inspectors","votes":"54","type":"x","order":"6","pct":9.05,"resources":[]},{"id":"31","title":"I'm thinking about retiring","votes":"65","type":"x","order":"7","pct":10.89,"resources":[]},{"id":"32","title":"I've decided to become a new inspector or marine surveyor.","votes":"60","type":"x","order":"8","pct":10.05,"resources":[]}] ["#ff5b00","#4ac0f2","#b80028","#eef66c","#60bb22","#b96a9a","#62c2cc"] sbar 200 200 /en/polls.html?id=7&task=poll.vote MSG_ERROR_NO_SELECTION Please select either existing option or enter your own, however not both. MSG_THANK_YOU_NO_RESULTS COM_COMMUNITYPOLLS_LABEL_ANSWERS Votes ...